Sweet • Sour • Savory

Food blog on scandinavian style food done right.

Mrs. Cross’s Christmas Syrup Cake - Sirupslagkage

Cake, Christmas, Desserts, HolidayTove Balle-PedersenComment
Mrs. Cross’s Christmas Syrup Cake - Sirupslagkage.

Mrs. Cross’s Christmas Syrup Cake - Sirupslagkage.

This type of cake was one of my mom’s favorites. She always told a story about getting a syrup layer cake at a friends house, where the buttermilk came from their own cows. Maybe my mom’s childhood food memories were tied to fond memories like my own. The syrup cake were not tied to Christmas in my home, but by adding the orange jam and chocolate is leans itself towards Christmas. My mom served hers with a sprinkle of powdered sugar on top, the chocolate ganache make it more decadent.

Ingredients:

Batter:

  • 125 g dark syrup

  • 75 g sugar

  • 75 g butter

  • 250 g all purpose flour

  • 1 teaspoon baking powder

  • ½ teaspoon backing soda

  • 1 teaspoon cinnamon

  • ½ teaspoon ground cloves

  • ½ teaspoon ground allspice

  • ½ teaspoon ground ginger

  • 150 ml buttermilk

Filling:

  • 5-6 heaping tablespoons Orange jam

Buttercream:

  • 250 g butter, salted and room temperature

  • 250 g confectionary sugar (powdered sugar)

  • 1 teaspoon vanilla bean paste

Chocolate ganache:

  • 200 ml heavy whipping cream

  • 200 g dark chocolate, finely chopped, I used Valrhona

  • 10 g butter

Garnish:

  • orange zest strips

Directions:

Preheat the oven to 355℉ (175℃).

Batter:

Melt butter, sugar, and syrup in a sauce pan, remove from heat, and let it cool for a few minutes. Mix the dry ingredients, and add it to the warm mixture, together with the buttermilk. Pour the batter into a 8-9-inch (22cm) springform, the bottom lined with parchment paper. And bake it for 30-35 minutes. Let the cake cool completely, before removing from the form.

Buttercream:

Cream the butter with the sugar for about 8-10 minutes, until it’s white and fluffy. Mix in the vanilla.

Ganache:

In a saucepan heat the cream to an almost simmer, remove it when small bubbles start forming at the edges. Pour it on top of the chopped chocolate and add the butter. Let it sit for about 30 seconds before you start stirring the mixture. This will give the chocolate time to start melting. Stir the ganache until it is smooth, glossy homogeneous.

Assembly:

Using a serrated knife, slice the cake horizontally in 2 layer, using gentle sawing motion. Spread the orange jam in a even layer on the lover part of the cake. On top of that spread all the buttercream in a thick even layer. Place the top part of the cake on top of the buttercream. Give it a little press to make the buttercream come out to the edge. Pour the ganache over the top of the cake, it’s ok if the ganache drips over the edges. Sprinkle with some orange zest on top, befor the ganache sets.

The cake will benefit from sitting a few hours or even overnight in the refrigerator before serving.

Enjoy!

Fedtebrød - Danish Coconut Shortbread

Tove Balle-PedersenComment
Fedtebrød - Danish Coconut Shortbread.

Fedtebrød - Danish Coconut Shortbread.

These coconut shortbreads are one of the easiest cookies to make. But it doesn’t mean that they lack flavor or delicacy. They have a short snap, and almost melts in your mouth. The icing is originally with rum (I used rum extract for more flavor), but you can use lemon juice and lemon zest for a more bright flavor.

Makes about 40.

Ingredients:

  • 200 g all-purpose flour

  • 200 g butter, salted and room temperature

  • 100 g shredded coconut, unsweetened

  • 100 g sugar

  • ¾ teaspoon bakers ammonia (hjortetaksalt)

Icing:

  • 150 g confectionary sugar (powdered sugar)

  • 1-2 tablespoons rum (or a few drops rum extract)

  • Egg white, pasteurized

Directions:

Preheat the oven to 400℉ (200℃).

In a stand mixer, mix all the ingredients together, don’t overwork the dough, you just want it to come together.

3C1F10DD-5128-46F5-B077-DE8F11CD6E20.jpeg

Divide the dough into 6 even parts, and roll each part into thumb size logs. Place 3 logs on a parchment paper lined baking sheet, using the palm og your hand pat the dough flat, so it will be about 1.5-inch (4 cm) wide.

Bake for 10-12 minutes until they are light golden. While the cookies are baking make the icing, placing a damp towel over the bowl, to prevent the icing from drying.

Transfer the warm baked cookies to a cutting board, and ice the cookies, in one thick line in the middle of the cookie. With a sharp knife cut the cookie on diagonally, about 1-inch (2½ cm) wide. Let the cookies cool completely before storing in an airtight container.

Enjoy!

Preserved Cherries - Syltede Kirsebær

Preserve, Sauce, JamTove Balle-PedersenComment
Preserved Cherries, here on some Risalamande.

Preserved Cherries, here on some Risalamande.

2020 has been a strange year, we all had to adapt and have to live without a lot of things we take for granted. A lot of parties and gatherings were canceled, friends and loved ones we couldn’t hug. Personally I was going to have a big party for my fiftieth birthday, with friends and families from Denmark coming here to celebrate. I don’t think I have to tell, that didn’t happen. I hope to postpone the party, and I’ll stay 49 until that happens.

I think 2020 also became the year, a lot of people learned to bake sourdough bread, that is one of the good things to come out of the pandemic.

Now we are getting close to my favorite time of the year - Christmas. I love all the lights and decorations, all the treats and cookies. I hope this holiday season will bring you a lot of joy too, even though we have to do some thing’s differently, let’s make this December extra special.

On this first Sunday in Advent I want to share these preserved cherries with you.

Growing up I was accustomed to my moms homemade everything. But even she slacked and started buying things, to make her life easier. But some tings remain in your memory as the best and real taste of something. Preserved cherries comes to mind. We had a cherry tree in our allotment (kolonihave), filled with dark tart cherries. Cherries you wouldn’t steal of the tree as a kid, or you would only do it once. But my mom made the best preserved cherries, perfect for the traditional Danish Christmas dessert Risalamande. She even cracked the pits from the cherries and put the kernels in the preserving syrup, giving it a strong almond taste. This was the real taste of Christmas. And this was the taste I rediscovered after making these preserved cherries for the very first time.

Makes 4 jars.

Ingredients:

  • 680 g pitted tart cherries, I used frozen

  • 525 g sugar

  • 50 ml water

  • 50 ml amaretto liquor

  • 40 ml vinegar

  • 1 vanilla bean

Directions:

Split open the vanilla bean and scrape the seeds out. Spread the seeds in some of the sugar, this helps with distribution of the seeds.

In a large pot add water, sugar, vinegar, amaretto, vanilla bean (seeds and pod), cherries, and warm it up slowly until it starts to boil lightly. Remove pot from the heat, and set it aside to cool and marinate for a few hours.

Prepare the jars and lids, scolding them and swirl some 100 proof vodka in them, set aside.

Bring the cherries to a boil, remove from heat, and bring them to a boil again, do that one more time, and scoop the cherries into the 4 prepared jars. Bring the liquid to a boil again, and let it boil and reduce for 5-7 minutes, before pouring over the cherries. Close jars and let then cool. Clean the outside of the jars and place them in a cool and dark place for about 20-30 days fore serving.

The preserved cherries will keep 3-5 months in a cool dark place and about 20 days opened.

Serve the prepared cherries on Risalamande, ice cream or other desserts or cakes. The syrup taste fantastic diluted with water or in drinks.

Enjoy!

Spinach and Feta Pie a la Spanakopita

Lunch, Sides, Vegetables, Vegetarian, DinnerTove Balle-PedersenComment
Spinach and Feta Pie a la Spanakopita

Spinach and Feta Pie a la Spanakopita

This is a simplification of the traditional Greek Spanakopita, a spinach feta pie or hand pie. It’s perfect for a lunch or light dinner. The crispness of the filo dough with the soft creamy filling is a great combination. An absolute favorite in my house.

Serves 4,

Ingredients:

  • 100 g pine nuts, dry roasted

  • 400 g baby spinach

  • olive oil for sautéing the spinach

  • 5 eggs

  • 275 g feta cheese, crumbled

  • 1 lemon, the zest of

  • 1 pinch of cayenne pepper

  • 9-10 sheets of filo dough (Store bought) defrosted according to instruction on packaging

  • ~50 g melted butter for brushing the filo dough

Directions:

Preheat the oven for the 400℉ (200℃).

Take out a 10-inch skillet, and sauté the spinach over medium heat until it is all wilted, take off the heat.

Mix eggs, feta cheese, pine nuts, lemon zest, and cayenne. When the spinach is cooled a bit, add it to the egg mixture. Dry off the pan you used for the spinach, set aside.

Place the filo dough under a damp tea towel, this will help to keep the filo dough soft and workable.

Place a large piece of parchment paper on the kitchen counter. I crumble the parchment paper first, and straighten it out again, this way it’s easier for the parchment paper to fit in the skillet. Brush some melted butter on the parchment paper. Place 4 sheets of the filo dough on top of the parchment paper in a rectangle, you want them to overlap a bit. Gently brush with melted butter, and repeat with 3-4 more layers of filo dough. Carefully transfer the parchment paper with the filo dough into the skillet, so the dough is hanging out over the edges of the skillet. Pour in the egg mixture in an even layer. Gently fold the filo doughs edges in over the filling. Brush the edges with a little more butter, and bake the pie for 18-20 minutes until the dough is golden and crisp, and the filling is set.

Serve the pie warm with a simple salad on the side.

Enjoy!

Cauliflower Salad with Apples & Almonds

Salad, Sides, VegetablesTove Balle-PedersenComment
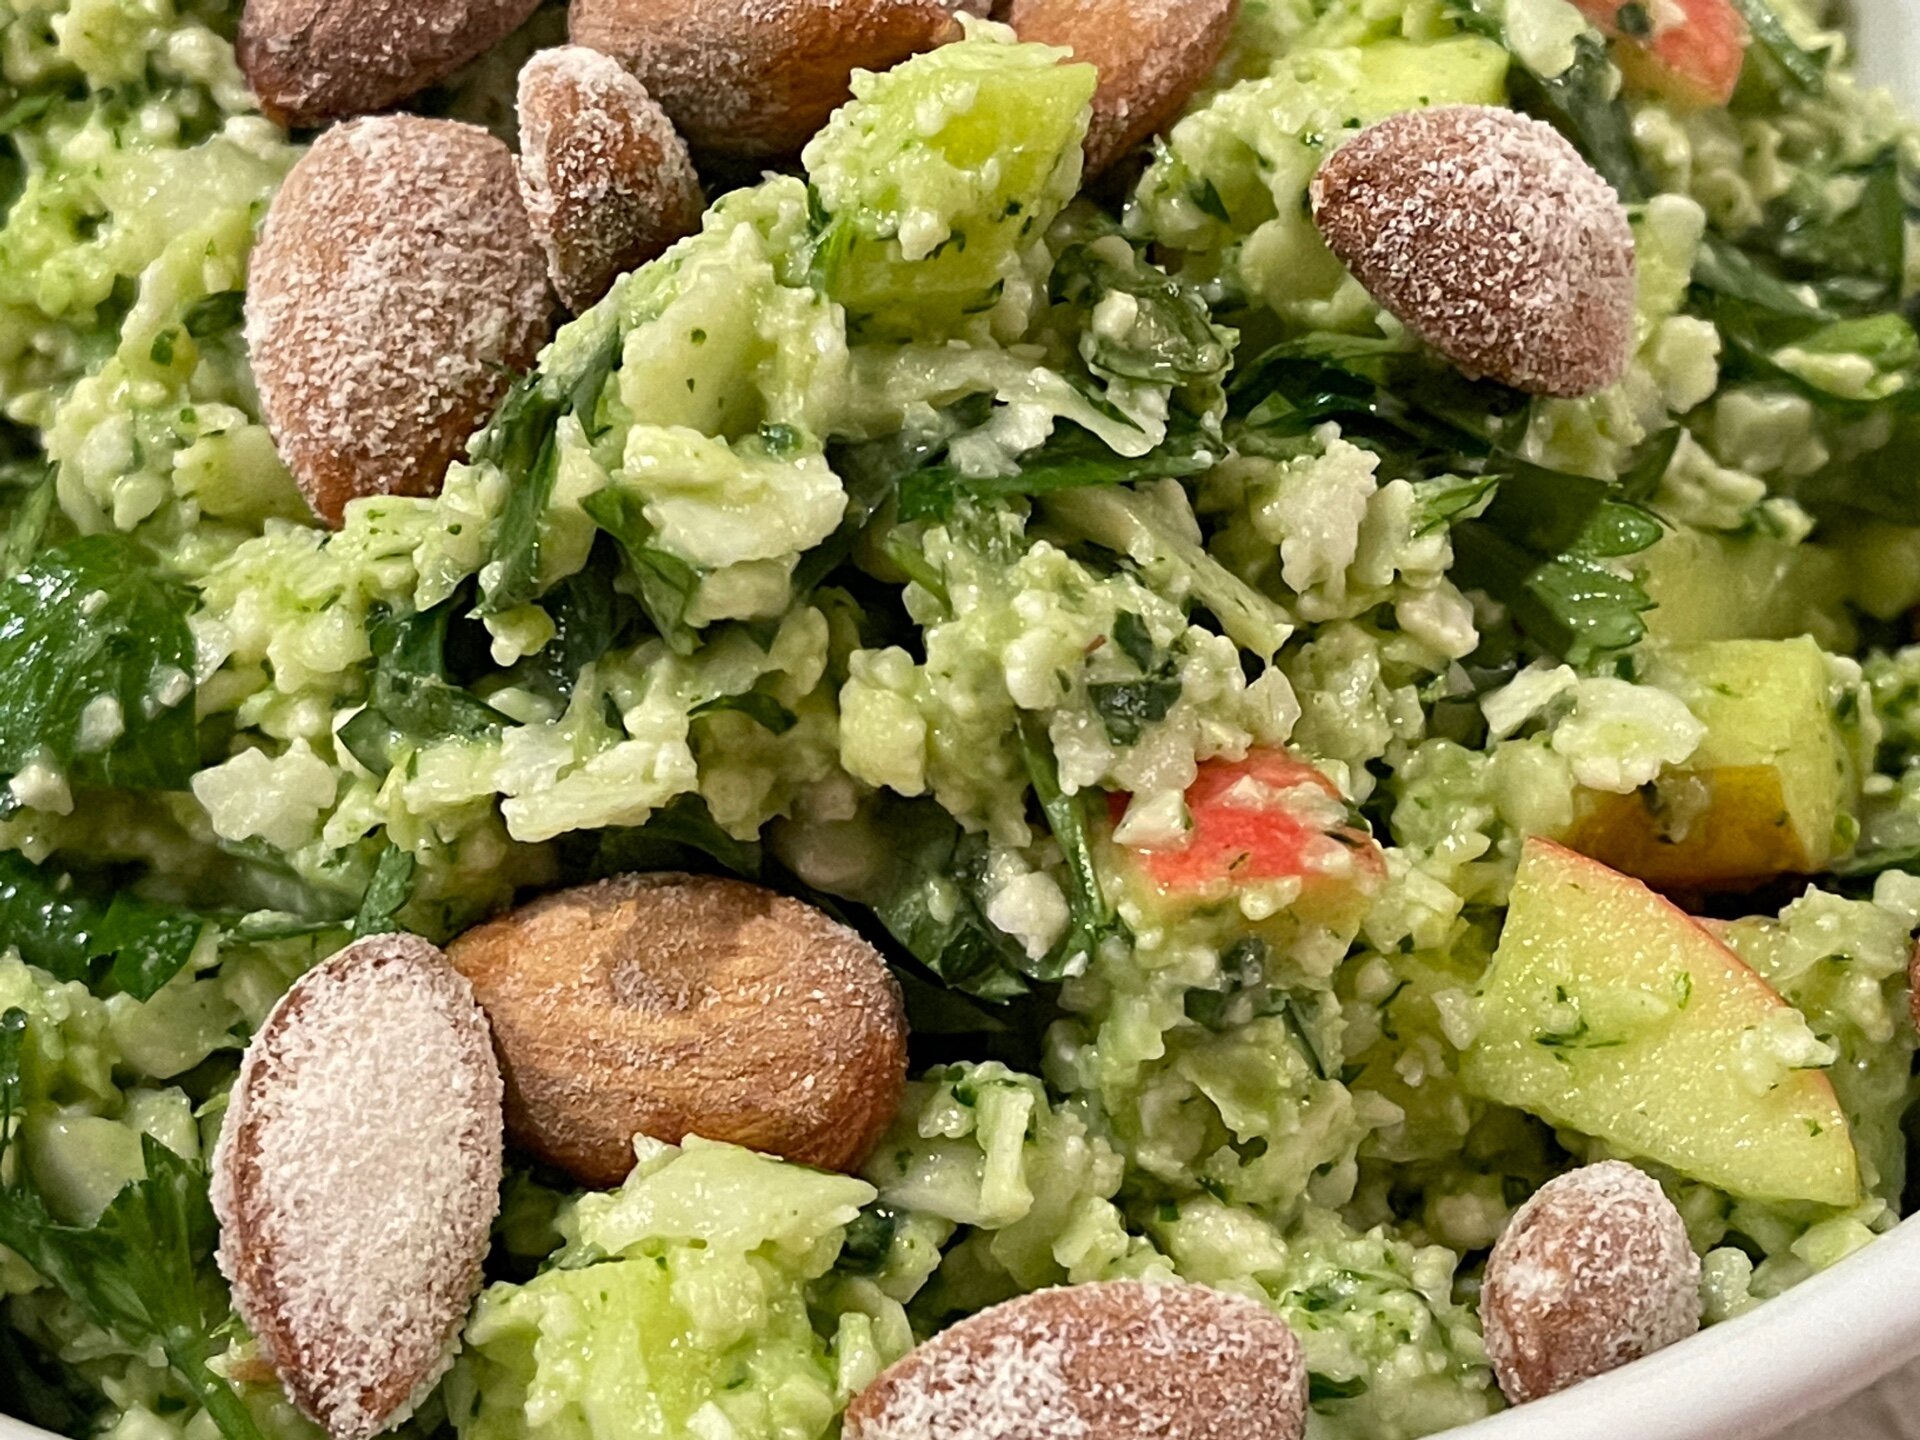
Cauliflower Salad with Apples & Almonds.

Cauliflower Salad with Apples & Almonds.

I found this recipe one one of my favorite Danish food blogs, Valdemarso. It’s a great everyday salat with lots of taste and texture. I lowered the amount of garlic in my version, so it won’t be overpowering, masking the other milder flavors. The salad will keep 2 days in the refrigerator.

Serves 4

Ingredients:

  • 1 cauliflower

  • 1 red apple

  • ½ handful Italian parsley

Dressing:

  • 2 handful Italian parsley,

  • ½ -1 garlic clove, chopped

  • 15 g pine nuts

  • 25 g Parmesan cheese, chopped roughly

  • 3 tablespoons olive oil

  • 3 tablespoons creme fraiche (or sour cream)

  • 1 teaspoon honey

  • salt & pepper to taste

Salted almonds:

  • 30 g raw almonds

  • 50 ml water

  • 1 teaspoon salt

Directions:

Salted almonds:

In a small skillet dissolve the salt in the water and bring the water to a boil. Stir in the almonds, and cook on medium high until the water is evaporated, shake the pan to get an even salt coating on the almonds. Let the almonds cool completely, before giving them a rough chop.

Dressing:

Combine all the ingredients except the creme fraiche in a food processor or mini chopper and pulse until coarsely chopped. Add creme fraiche and process until fully incorporated and you have smooth paste. Season with salt and pepper.

Salad:

Grate or finely chop the cauliflower and chop the parsley. Wash an and core the apple, and dice it. Mix all the ingredients with the salted almonds and dressing, season with salt and pepper. Now the salad is ready to serve.

Enjoy!