Sweet • Sour • Savory

Food blog on scandinavian style food done right.

Sides

Roasted Cauliflower in Tahini Dressing

Dinner, dressing, Sides, Vegetables, VegetarianTove Balle-PedersenComment

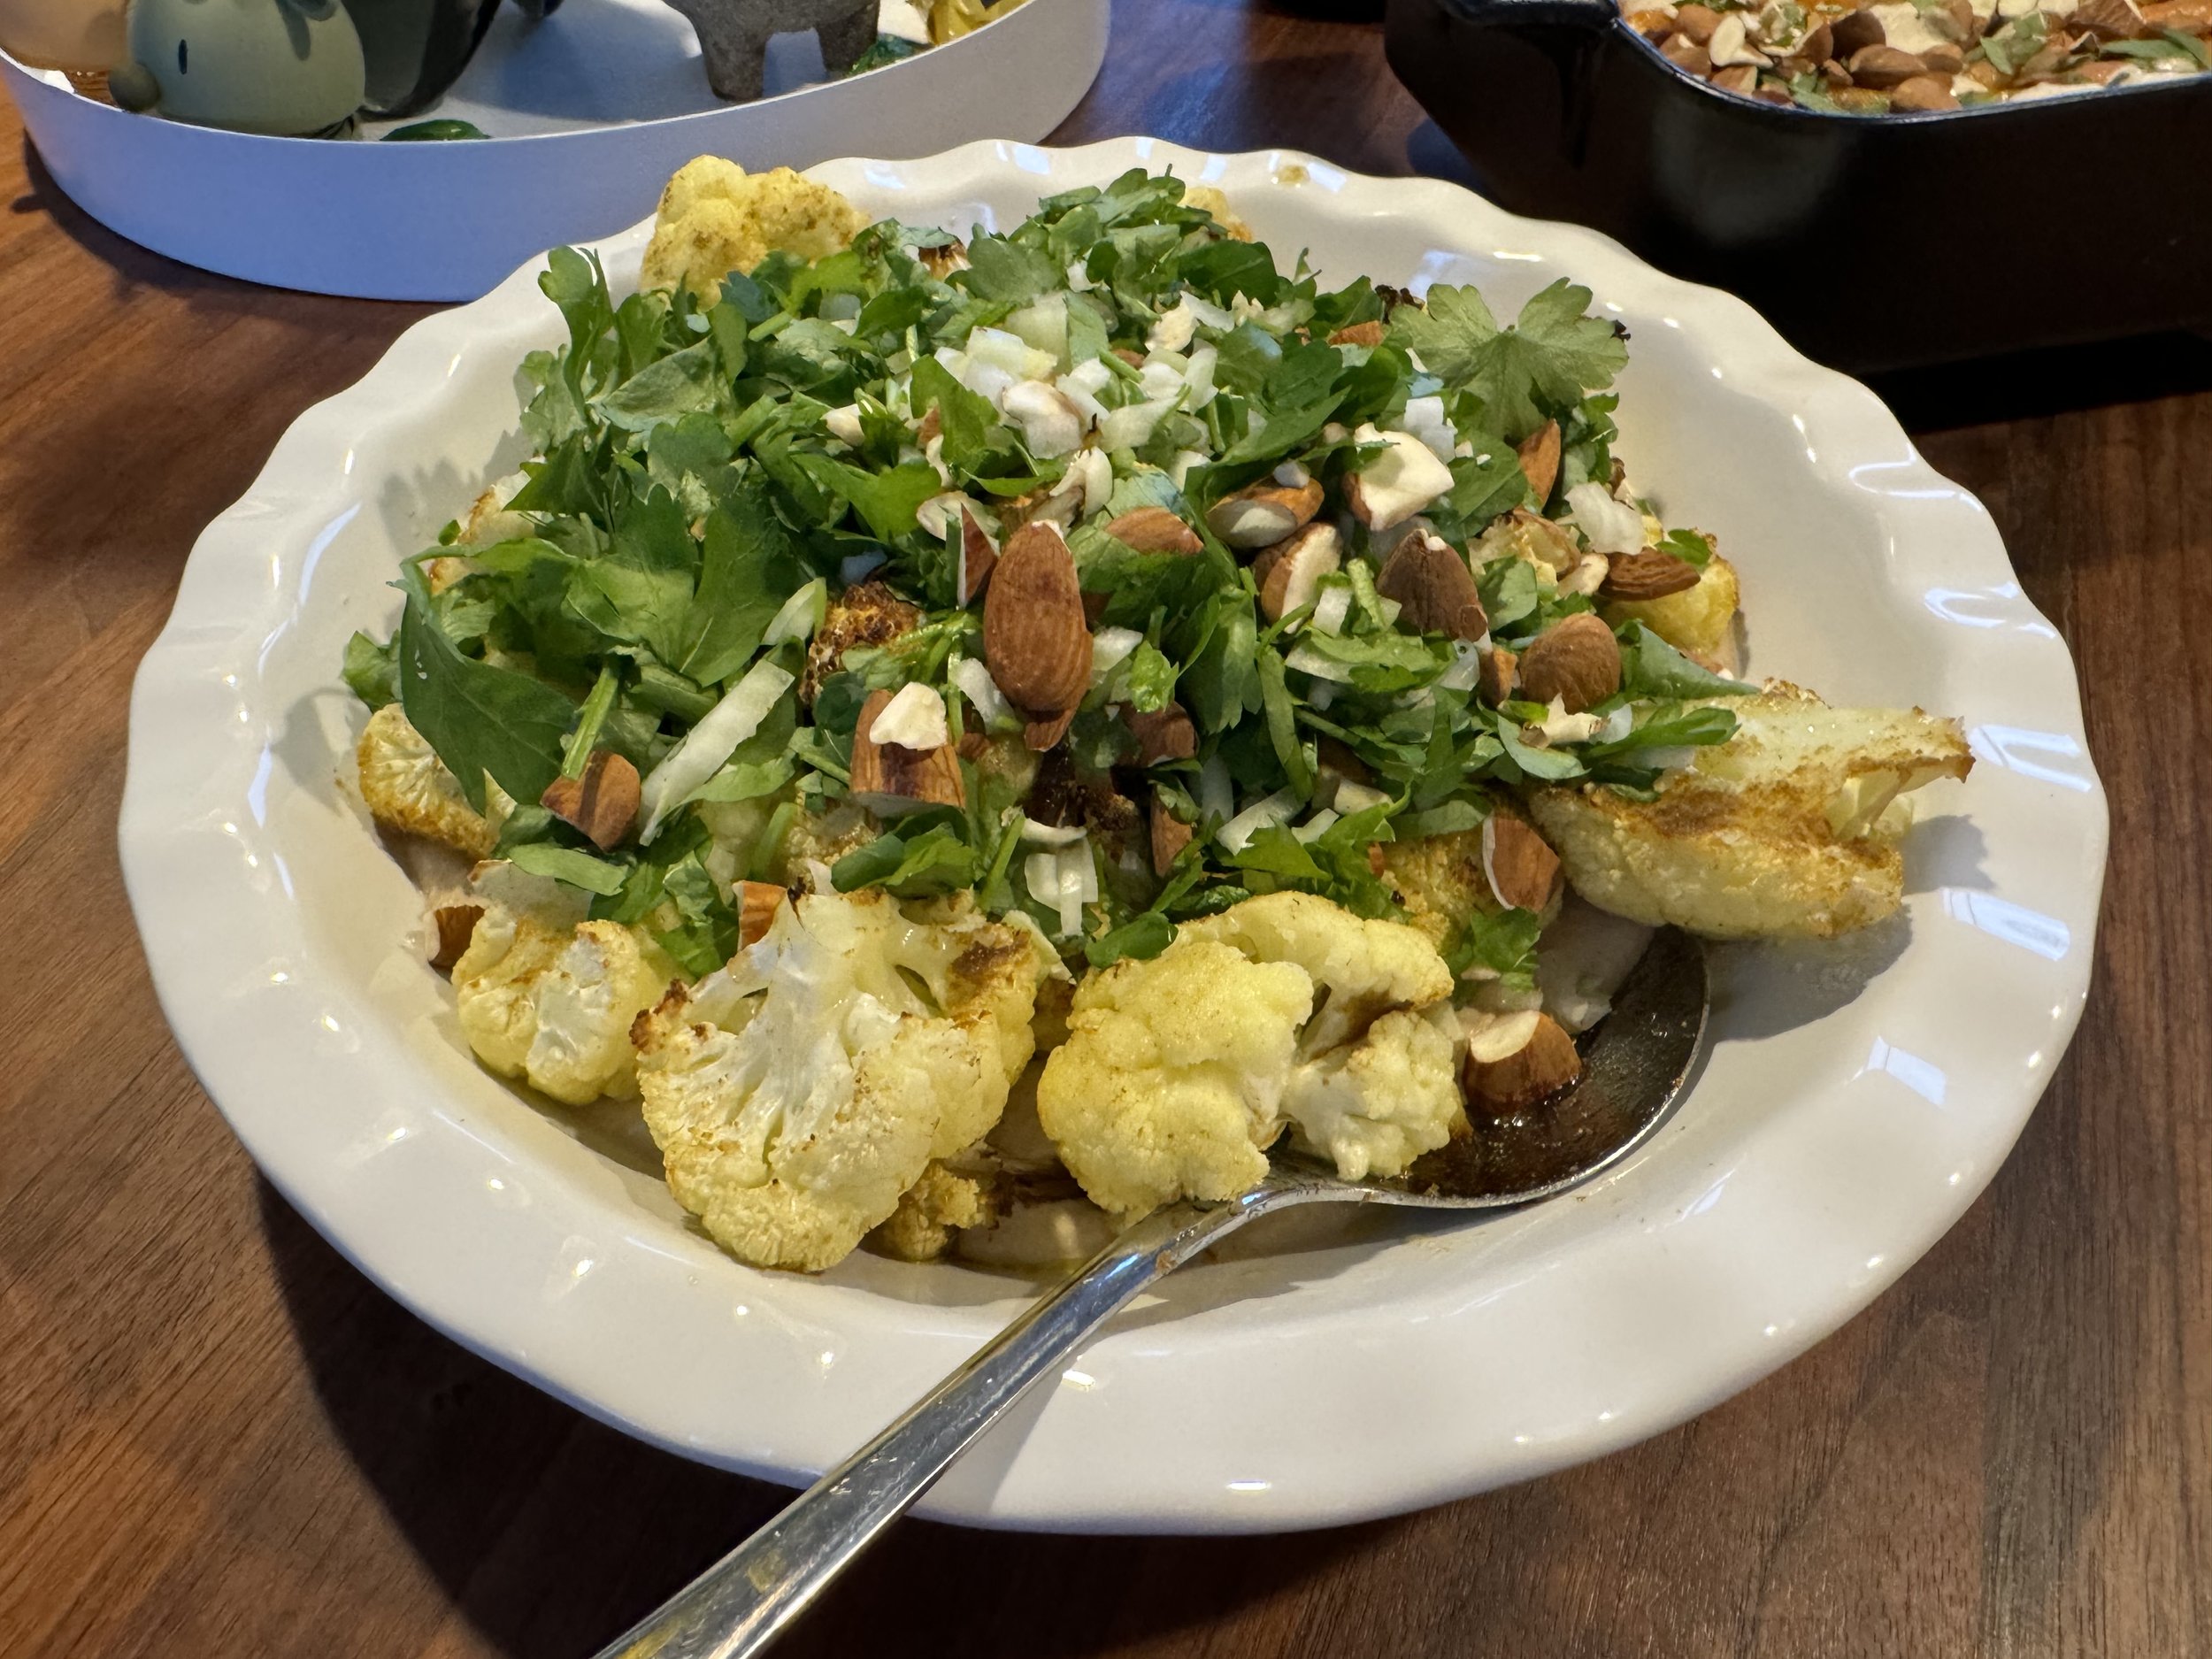
Roasted Cauliflower in Tahini Dressing

One of my favorite vegetables is cauliflower. I love it raw, cooked, baked, and as cauliflower rice.

A few weeks ago I saw this version on a tahini dressing, and thought I had to try it. it didn’t disappoint.

The cauliflower is sprinkled with cumin and roasted in the oven, then placed on top of the dressing, with a topping of parsley, onion and almonds

This is the perfect side for a piece of grilled meat, like lamb or chicken.

Serves 4.

Ingredients:

Roasted cauliflower:

  • 1 cauliflower, cut into bouquets

  • 4 tablespoons olive oil

  • 1 tablespoon cumin

  • Sprinkle of salt

Tahini dressing:

  • 2 tablespoons tahini

  • 6 tablespoons Greek yogurt

  • 1 garlic clove,

  • 1 tablespoon lemon juice, freshly squeezed

  • Salt to taste

Topping:

  • 4 tablespoons almonds, roasted and chopped

  • 1 handful Italian parsley, chopped

  • 1 small onion, finely diced

Directions:

Preheat the oven to 430℉/220℃.

Place cauliflower on a parchment paper lined baking sheet, drizzle olive oil over and sprinkle salt and cumin, mix it so the cauliflower is evenly coated. Roast the cauliflower for 15-20 minutes. You want them to be tender with a bit of a crunchy texture.

Mix the ingredients to the dressing and season additional salt and lemon juice to taste.

Mix the topping in a bowl, and set aside

Spread the dressing on to a serving dish, place the roasted cauliflower on top, adding the topping on last.

Serve immediately.

Enjoy

Danish version:

Bagt blomkål med tahindressing

Ingredienser:

Blomkål:

  • 1 blomkål, delt op i buketter

  • 4 spsk oliven olie

  • 1 spsk spidskommen

  • Lidt salt

Tahindressing:

  • 2 spsk tahini

  • 6 spsk græsk yoghurt

  • 1 fed hvidløg

  • 1 spsk friskpresset citronsaft

  • Salt, efter smag

Topping:

  • 4 spsk grofthakkede ristede mandler

  • 1 håndfuld bredbladet persille, groft hakket

  • 1 lille løg, finthakket

Fremgangsmåde:

Forvarm oven til 220℃.

Blomkål:

Vend blomkålsbuketterne med olivenolie, spidskommen og salt. Kom blomkålen på en bageplade, med bagepapir. Bag blomkålen i 15-20 minutter indtil de er møre med lidt bid, og har fået lidt farve.

Dressing:

Bland alle ingredienserne sammen i en skål, smag til med ekstra salt og citron.

Topping:

Bland ingredienserne sammen.

Kom et godt lag dressing ud på et fad, kom det bagte blomkål ovenpå. Fordel toppingen øverst og server.

Enjoy!
Moroccan Style Roasted Carrots

Dinner, Sides, Vegetables, VegetarianTove Balle-Pedersen1 Comment

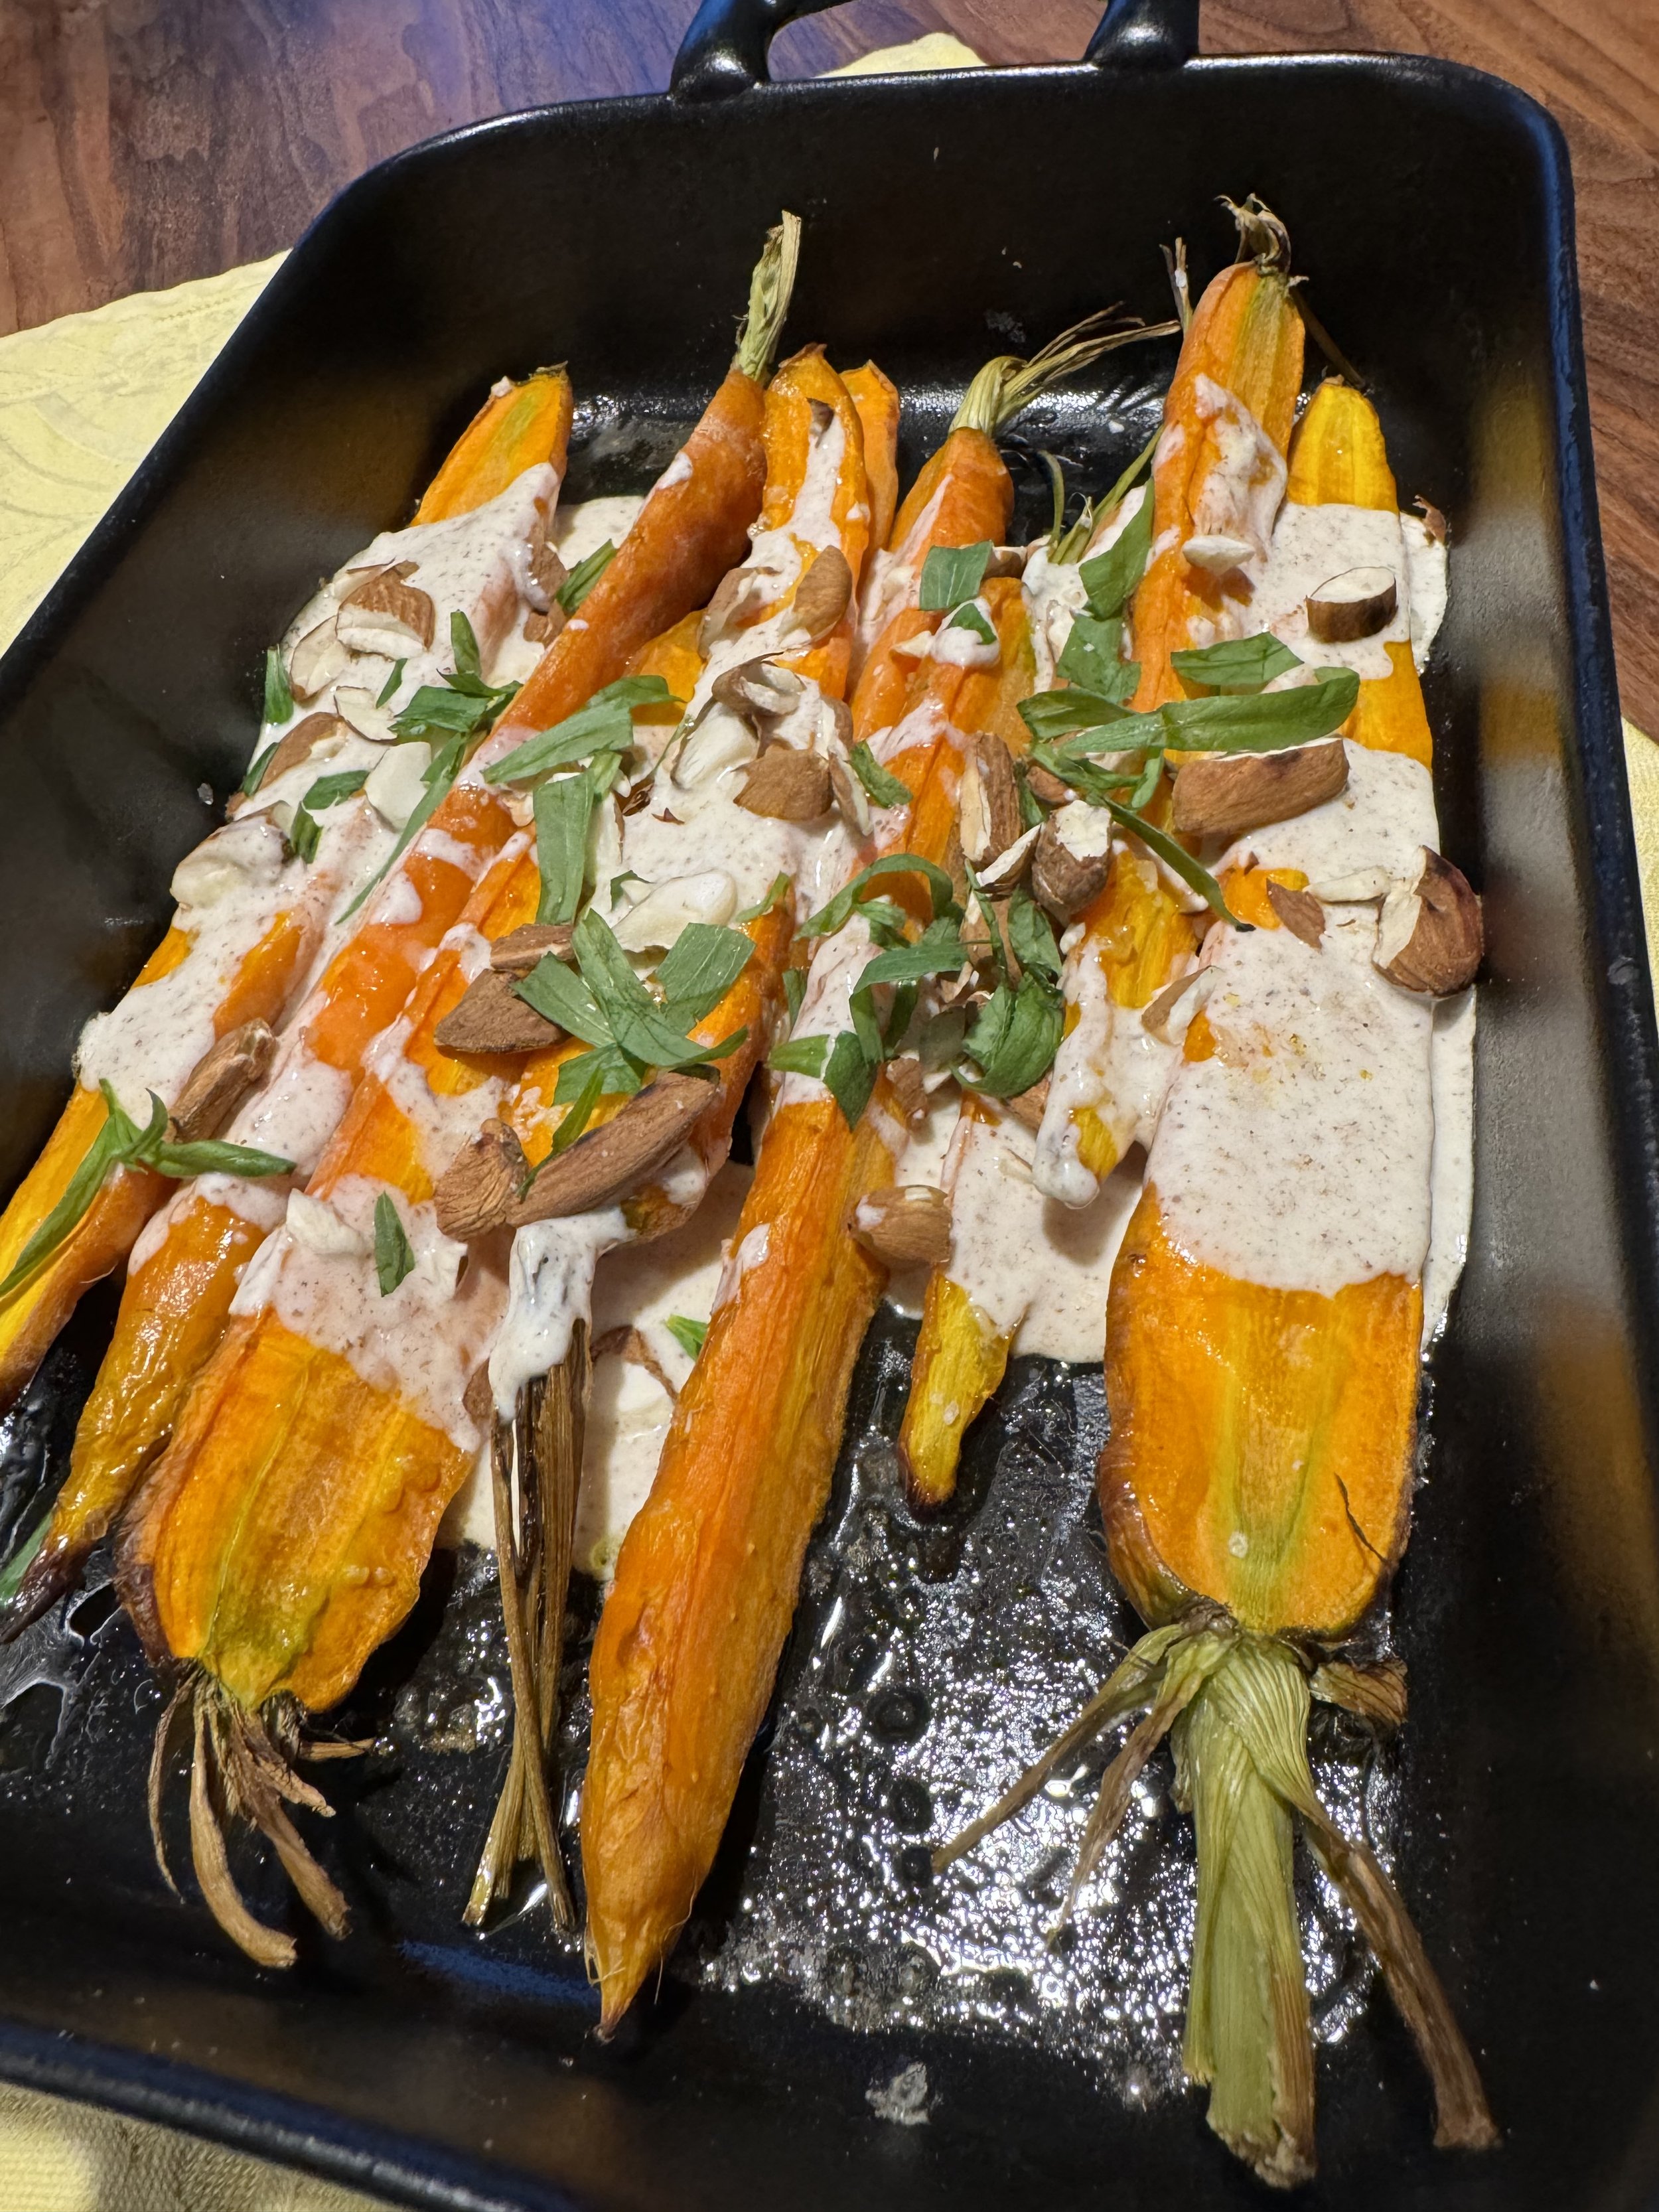
Moroccan Style Roasted Carrots

I have been looking for more interesting ways to serve vegetables. Especially in the early spring, before all the summer vegetables gets in the stores.

The combination of flavors and textures from the dressing and topping really elevate the humble carrot into something special. These carrots are a new favorite, so I recommend to make plenty.

We had these carrots as a part of a Moroccan themed dinner, with roasted leg of lamb seasoned with ras el hanout, roasted cauliflower with tahini dressing and couscous.

The recipe is adapted from Julie Bruun.

Serves 2-3.

Ingredients:

  • 10-12 carrots (the small ones with the top or thin snack carrots

  • Oil for the baking

  • A sprinkle of salt

    Dressing:

  • 100 ml Greek style yogurt

  • ½ teaspoon cumin

  • ½ teaspoon ground coriander

  • ¼ teaspoon cinnamon

  • ½ teaspoon salt

    Topping:

  • Fresh tarragon, chopped

  • Almonds, roasted and coarsely chopped

Directions:

Preheat the oven for 425℉ / 220℃.

Wash the carrots, and trim off most of green top part. Place the carrots in an ovenproof dish, and toss them with oil and a sprinkle of salt.

Roast the carrots for 15-20 minutes. Let the carrots cool for a minute, before adding dressing and topping.

Serve the carrots immediately.

Enjoy!

Green Bean and Asparagus Salad with Lemony Feta Dressing

Salad, Sides, Vegetarian, Vegetables, dressingTove Balle-PedersenComment

Green Bean and Asparagus Salad with Lemony Feta Dressing.

This salad is a fresh and crisp side perfect for a summer BBQ. The creamy lemony feta dressing makes it a perfect parring to almost everything. It’s great with fish, chicken and even for ribs or roasts.

I was in search of a salad without leafy greens, a more crunchy salads. Previously I have been using green beans and snap peas for this, so I added some extra crunch with asparagus and radishes. The cheesy lemony dressing was a mix of my love of feta mixed with the taste of the lemon pepper pasta.

Serves 3-4.

Ingredients:

  • 200g green beans, trimmed

  • 1 bunch (10-15) asparagus, trimmed

  • 125g snap peas

  • 10 radishes, sliced

Dressing:

  • 1 lemon, the juice from

  • 2 tablespoons lemon olive oil

  • 75g feta cheese

  • freshly ground pepper

Directions:

Wash and trim snap peas, asparagus, and green beans. For the asparagus I hold each stalk about half way down its length, and at the thick end. Then bend the stalk until it snaps, discard the thick end. This way you only get the good crispy part of the asparagus.

Blanch the vegetables for 1 minute, by adding the vegetables to a large pot of boiling water. With a slotted spoon remove the vegetables from the boiling water and plunge them in a large bowl with ice water. Cut the vegetables into bite-size pieces. Spread the vegetables in a shallow bowl, and sprinkle the sliced radishes on top.

Mix all the ingredients for the dressing, using a fork to incorporate the feta to the dressing. Pour the dressing over the salad, and mix it well.

Serve the salad as a side to your favorite protein, or to your summer BBQ.

Ratatouille

Dinner, Sides, vegan, Vegetables, VegetarianTove Balle-Pedersen2 Comments

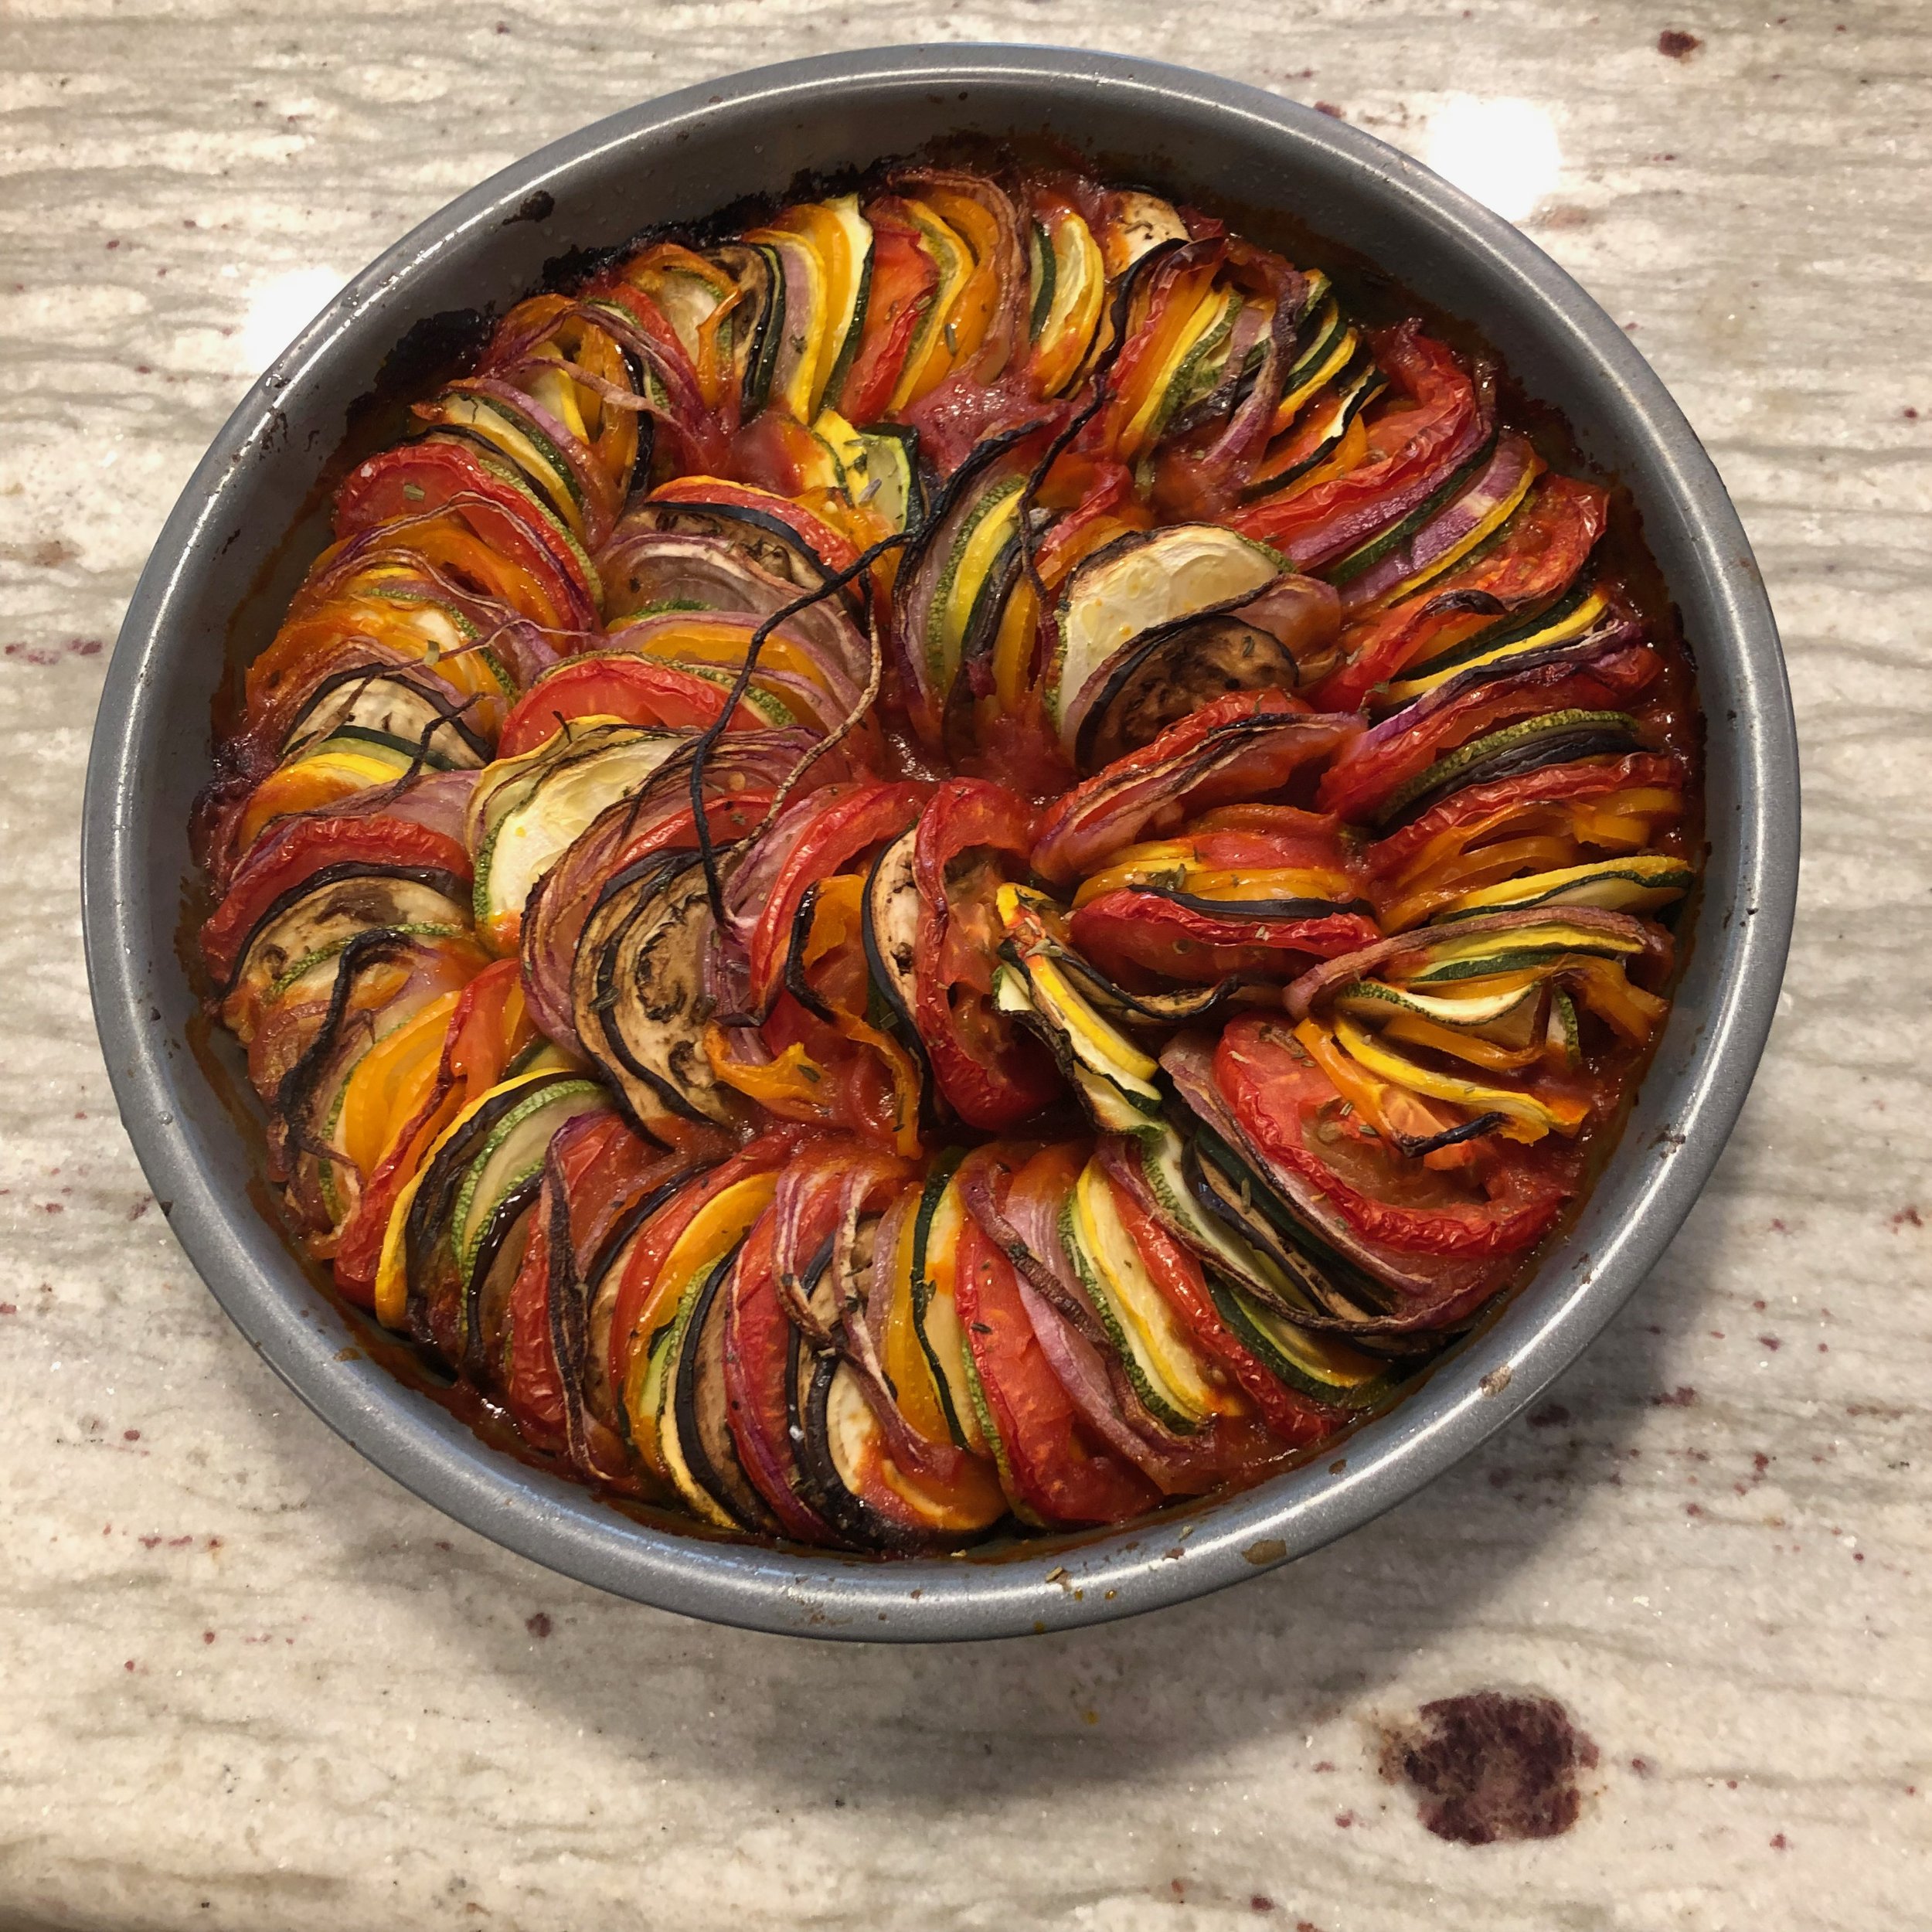
Ratatouille.

Ratatouille is a French vegetable stew. Back in the days it was characterized as peasant food, because vegetables were cheap.

In this version the vegetables are thinly sliced, and arranged nicely in the tomato sauce. I looks like it takes forever, but if you slice all the vegetables first, it only takes a few minutes, and looks like a million dollars.

We often have ratatouille as a side dish or served with rice and a slice of some good bread. Sprinkle some fresh shaved parmesan cheese on the ratatouille as you serve it, and it takes it over the top. Another advantage by cooking it like this is, that you get some nice caramelization of the vegetables, which gives added flavor to the dish.
Pick good quality vegetables, because this is a rather simple dish, and the vegetables are the stars, so the better the vegetables the better the dish. I normally use canned tomatoes for the sauce, but you can easily substitute it with crushed fresh tomatoes, it might even be better.

Leftovers will keep a day or two in the refrigerator, and are fantastic as breakfast with a poached egg, kinda like a Shakshuka.


Serves 3-4 as a side

Ingredients:

  • 1 can crushed tomatoes

  • 1 tablespoon extra virgin olive oil

  • ¼ teaspoon apple cider vinegar

  • 2 cloves garlic, minced

  • 1 tablespoon fresh basil, about 3-4 large leaves, sliced

  • 1 teaspoon herbs de Provence spice mix

  • ¼ teaspoon salt

  • ¼ teaspoon freshly grounded black pepper

  • ¼ teaspoon chili powder

  • 1 medium red onion, thinly sliced

  • 1-2 large zucchini, I used both summer squash and zucchini

  • 1 Japanese eggplant, or regular eggplant, with quartered slices

  • 3-4 large fresh tomatoes, sliced

  • 2-3 small bell peppers, sliced

Instructions:

Preheat oven to 350℉ (180℃). Lightly grease a 9" baking dish and set aside. I used a round dish here, but any ovenproof dish will do.

In a mixing bowl, combine the crushed tomatoes, oil and vinegar, and stir in salt and the other spices.

Pour the tomato mixture into the prepared baking dish in an even layer..

Ratatouille ready to serve.

Stack the veggie slices in alternating patters, you don't have to go all OCD on this, it will be pretty no matter how you do this. The most important thing is to spread the onions around, so it spreads its flavor throughout.

Sprinkle a little olive oil on top to encourage the caramelization of the vegetables.

Bake for about an hour, until the tomato sauce is bubbling and the veggies are tender, but not mushy.

Serve the ratatouille hot or warm.

Enjoy!

Spinach and Feta Pie a la Spanakopita

Lunch, Sides, Vegetables, Vegetarian, DinnerTove Balle-PedersenComment
Spinach and Feta Pie a la Spanakopita

Spinach and Feta Pie a la Spanakopita

This is a simplification of the traditional Greek Spanakopita, a spinach feta pie or hand pie. It’s perfect for a lunch or light dinner. The crispness of the filo dough with the soft creamy filling is a great combination. An absolute favorite in my house.

Serves 4,

Ingredients:

  • 100 g pine nuts, dry roasted

  • 400 g baby spinach

  • olive oil for sautéing the spinach

  • 5 eggs

  • 275 g feta cheese, crumbled

  • 1 lemon, the zest of

  • 1 pinch of cayenne pepper

  • 9-10 sheets of filo dough (Store bought) defrosted according to instruction on packaging

  • ~50 g melted butter for brushing the filo dough

Directions:

Preheat the oven for the 400℉ (200℃).

Take out a 10-inch skillet, and sauté the spinach over medium heat until it is all wilted, take off the heat.

Mix eggs, feta cheese, pine nuts, lemon zest, and cayenne. When the spinach is cooled a bit, add it to the egg mixture. Dry off the pan you used for the spinach, set aside.

Place the filo dough under a damp tea towel, this will help to keep the filo dough soft and workable.

Place a large piece of parchment paper on the kitchen counter. I crumble the parchment paper first, and straighten it out again, this way it’s easier for the parchment paper to fit in the skillet. Brush some melted butter on the parchment paper. Place 4 sheets of the filo dough on top of the parchment paper in a rectangle, you want them to overlap a bit. Gently brush with melted butter, and repeat with 3-4 more layers of filo dough. Carefully transfer the parchment paper with the filo dough into the skillet, so the dough is hanging out over the edges of the skillet. Pour in the egg mixture in an even layer. Gently fold the filo doughs edges in over the filling. Brush the edges with a little more butter, and bake the pie for 18-20 minutes until the dough is golden and crisp, and the filling is set.

Serve the pie warm with a simple salad on the side.

Enjoy!