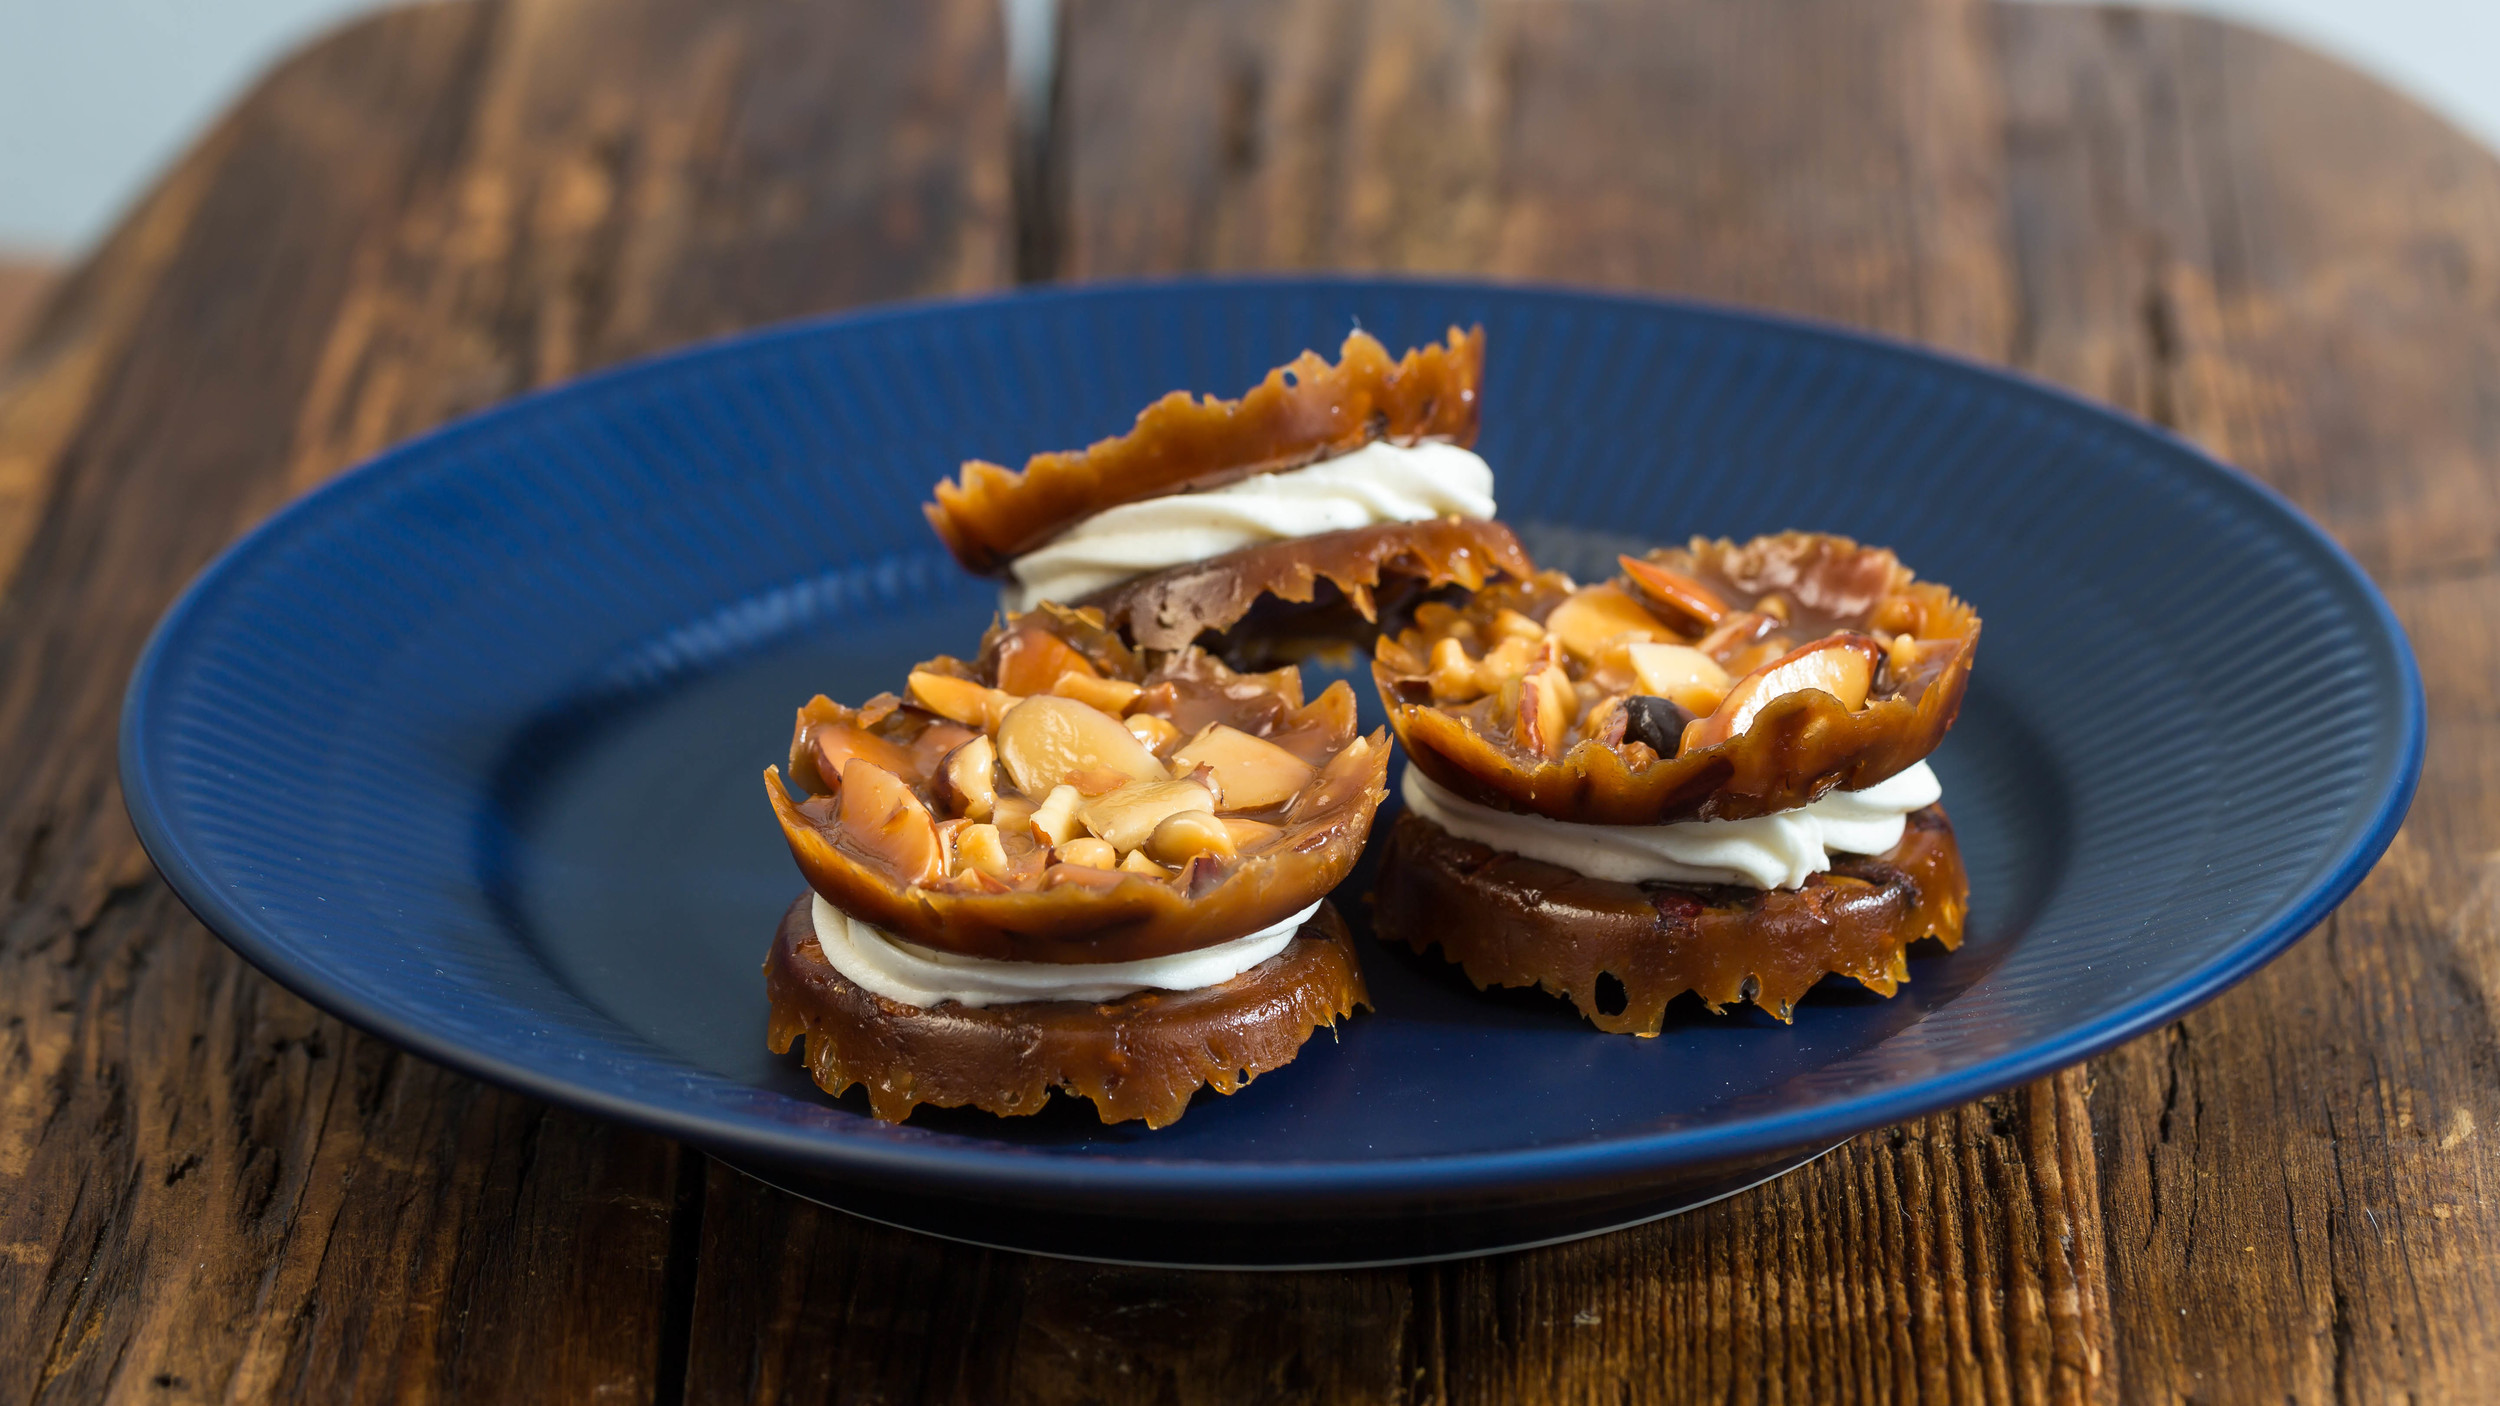
Florentines with Vanilla Buttercream
This crispy caramel and nut cookie is a classic in most of Europe. They are really tasty and fairly sweet.
They are really easy to make, and you don’t have to be a baker to make them. The most difficult will be making the buttercream. The cookies will look really fancy, with little to no work. You can use most kind of nuts, and even add some candied cherries if you like.
Makes 9
Ingredients:
Nuts:
50 g sliced almonds
50 g chopped hazelnuts
25 g pistachios
Caramel:
100 g butter, salted
100 g sugar
1 tablespoon all-purpose flour
2 tablespoons whipping cream
1 tablespoon thick syrup
Vanilla buttercream:
2 tablespoons pasteurized egg whites
100 g confectionary sugar
150 g butter, salted and room temperature
½ teaspoon vanilla paste
Directions:
Preheat the oven for 350℉ (175℃).
Mix the ingredients for the caramel in a small saucepan. Gently heat the mixture until the butter and sugar are melted. Mix in the nuts, and remove from heat.
Scoop about a teaspoon of the mixture into 2 nonstick muffin pans.
Bake the cookies for about 10-12 minutes until golden brown. Let the cookies cool for about 10 minutes in the pan. Gently remove the cookies from the pan. I used a knife to get them out. Let the cookies cool completely.
Buttercream:
Mix all the ingredients in a bowl, and whip the buttercream until thick and fluffy over a double boiler. I used a saucepan with very hot water, and placed my bowl on top of that. I didn't have it on the stove. It takes some time to get the buttercream nice and fluffy.
Pipe the buttercream on the bottom of half the cookies, top with the rest of the cookie, bottom side down, pressing lightly to adhere.
Serve with a nice cup of tea or coffee.
Enjoy!
The Danish version:
Florentinere
Ingredienser:
Nødder:
50 g mandelflager
50 g hasselnøddeflager
25 g hakkede rå pistacienødder
Karamel:
100 g saltet smør
100 g sukker
1 spsk hvedemel
2 spsk fløde
1 spsk mørk sirup
Vanillesmørcreme:
2 spsk pasteuriserede æggehvider
100 g flormelis
150 g smør, saltet og stuetemperatur
½ tsk vanille pasta eller kornene fra ¼ vanillestang
Fremgangsmåde:
Opvarm ovnen til 175℃.
Bland alle ingredienserne til karamellen i en lille gryde. Varm blandingen op indtil smør og sukker er smeltet. Bland nødderne i, og tag gryden af varmen.
Kom ca. en teskefuld af blandingen op i slip-let muffinforme, så det lige dækker bunden.
Bag kagerne i 10-12 minutter, indtil de er let gyldne. Køl kagerne af i 5-10 minutter inden de tages ud af formene. Lad kagerne køle helt af på en bagerist.
Smørcreme:
Bland alle ingredienserne i en skål og pisk smørcremen over vandbad, indtil den er let og luftig. Jeg satte skålen ovenpå en gryde med næsten kogende vand, uden at have varme under gryden, og jeg piskede med en en håndmikser.
Sprøjt smørcremen på undersiden af halvdelen af kagerne. Den anden halvdel lægges ovenpå dem med fyld, med bunden nedad.
Server kagerne med en god kop the eller kaffe.
Velbekomme!