Sweet • Sour • Savory

Food blog on scandinavian style food done right.

Bread

Pullman Sandwich Loaf

Bread, Breakfast, BrunchTove Balle-PedersenComment
Pullman Sandwich Loaf

Pullman Sandwich Loaf

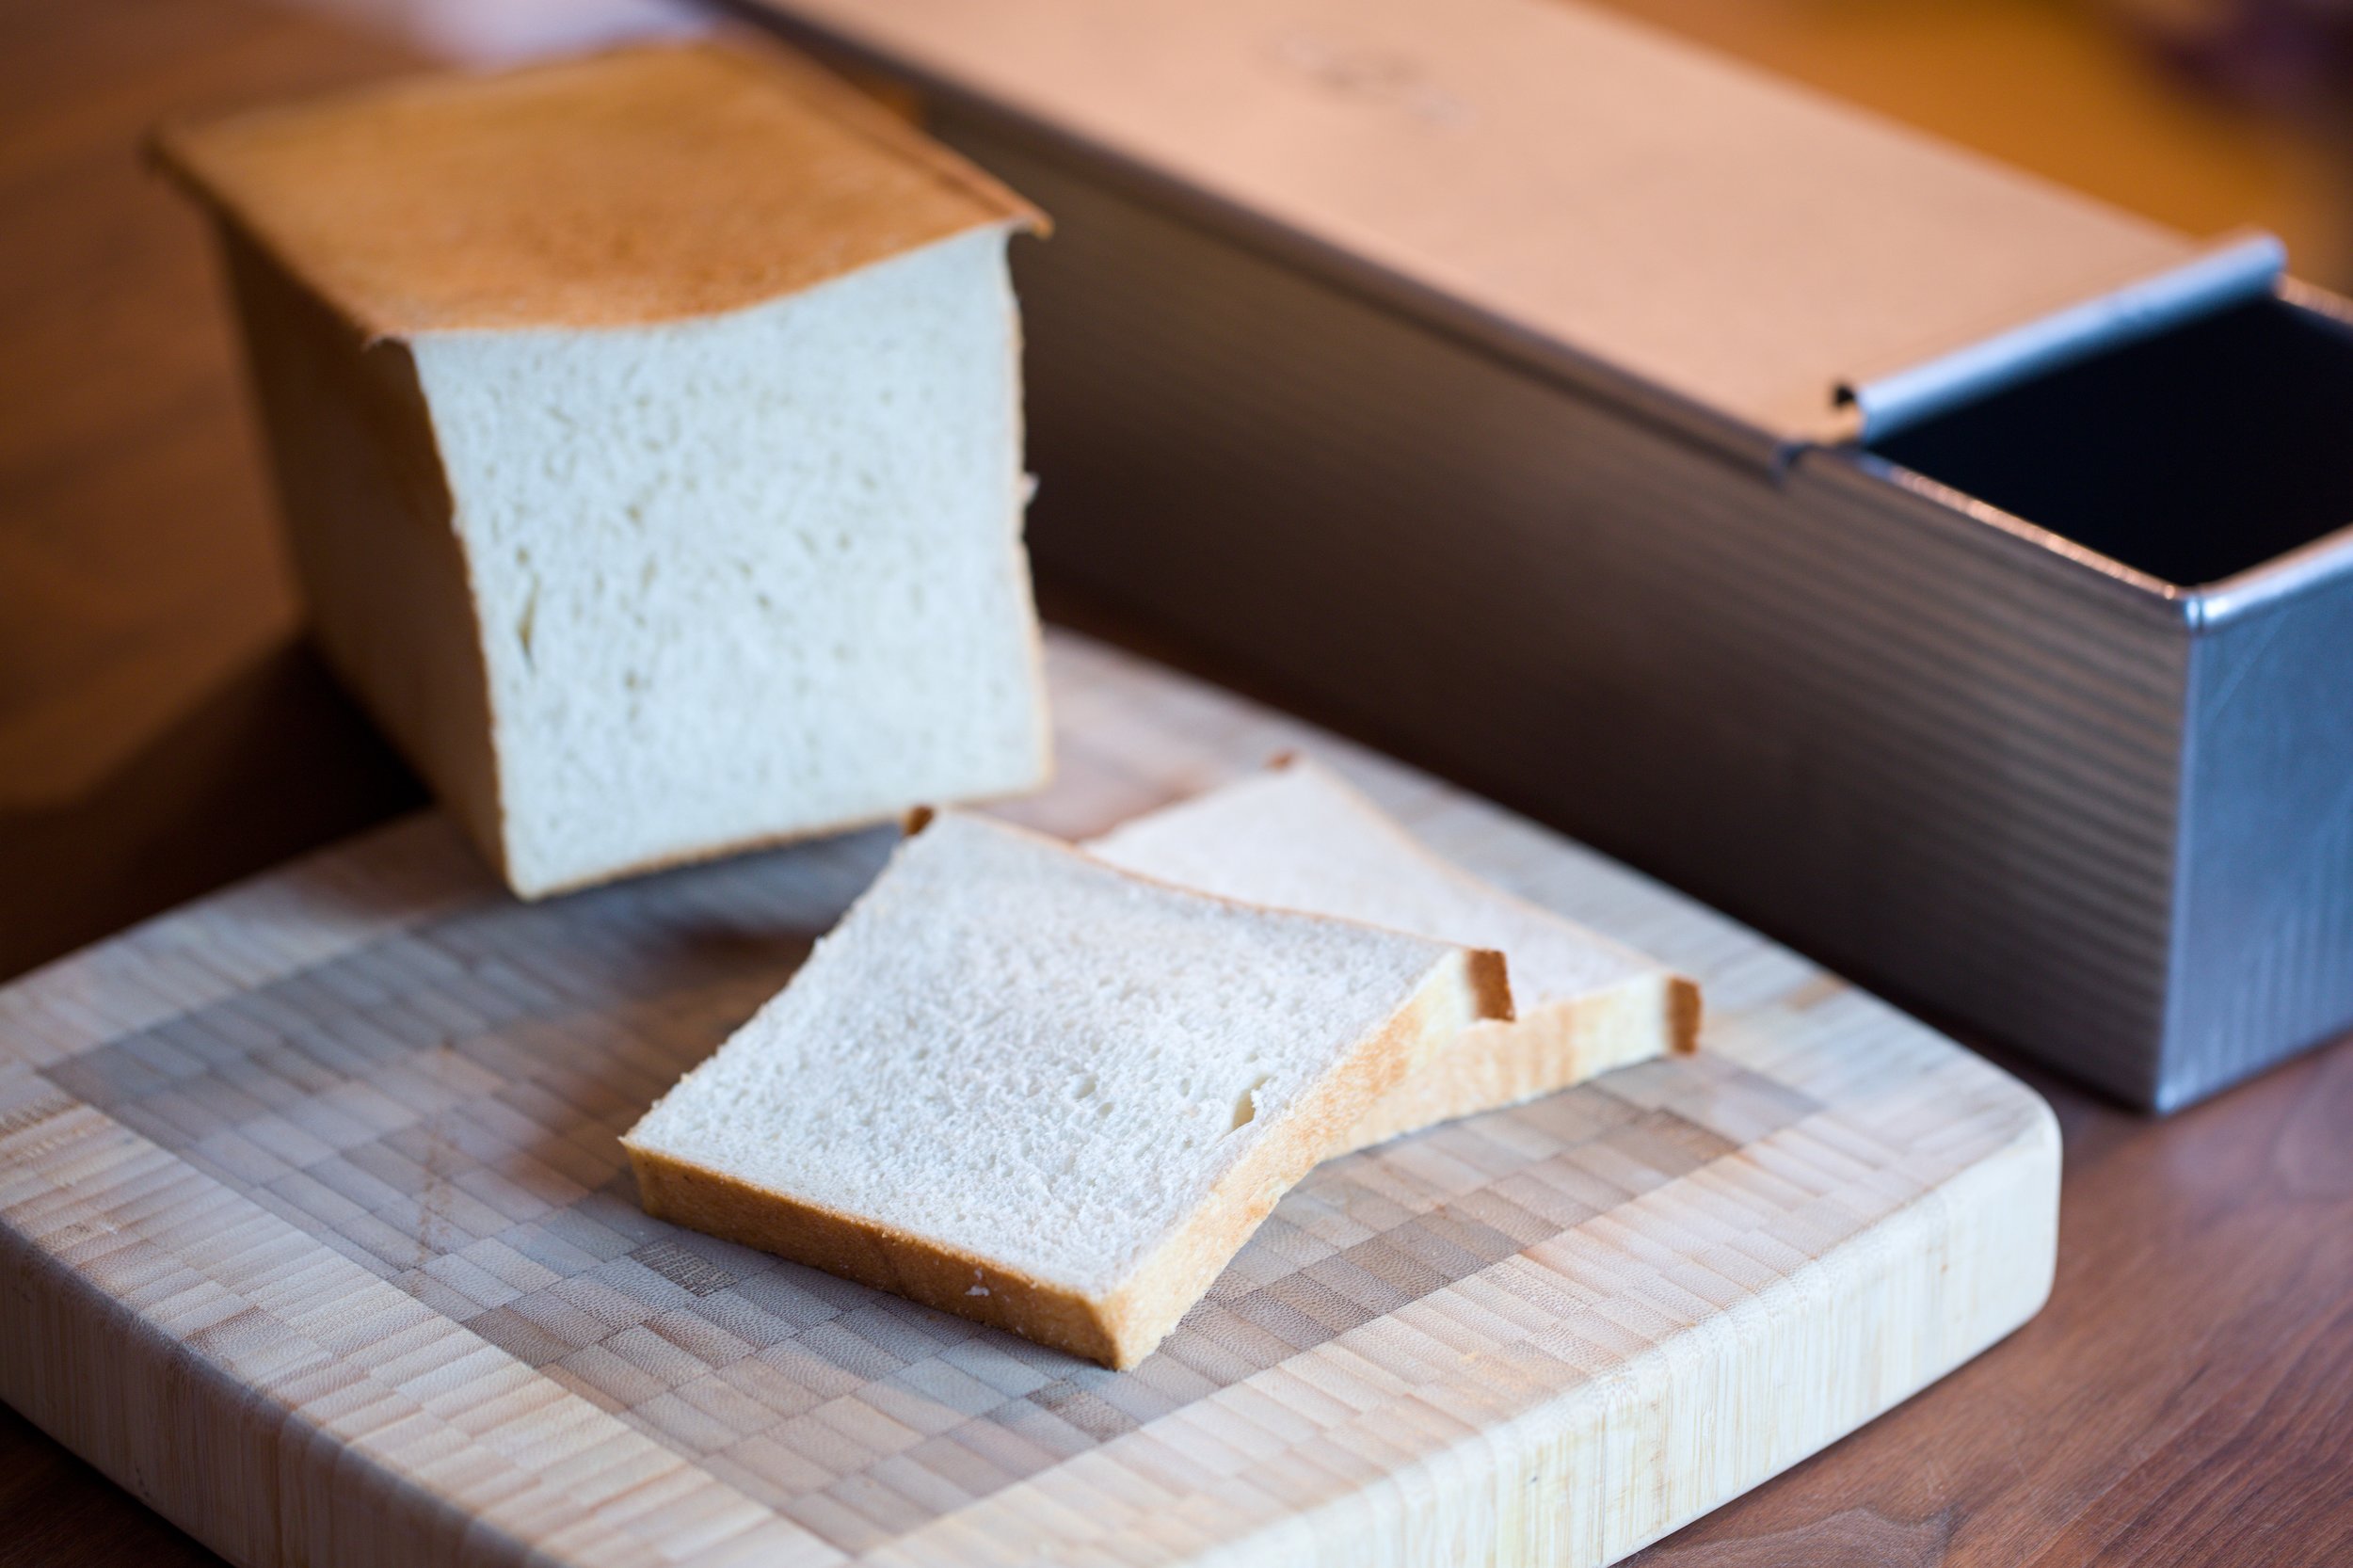
We have all bought sandwich bread in the stores. And you might ask why spend so much time baking this simple loaf. But this loaf is not your average sandwich bread. This is a feather light sweet soft loaf. And compared to most store bought loafs, this bread is filled with ingredients you actually can pronounce. We used the bread to make simple sandwiches in a panini press. And compared with store bought, the slices of the bread didn't flatten under pressure. Well worth the effort.

Ingredients:

  • 450 g all-purpose flour
  • 100 g Ølandshvedemel (you can use all-purpose flour or bread flour)
  • 6 g dry yeast
  • 32 g sugar
  • 11 g fine salt
  • 285 ml water
  • 1 egg
  • 25 g butter, salted and room temereature
  • 80 g cream cheese
  • egg wash 

Directions:

Spray a large bowl and the pullman loaf pan with non-stick spray, set aside.

Combine all the ingredients except the egg wash in the bowl for a stand mixer. Knead 4-5 minutes on low speed to form the dough. Keep kneading on medium low for another 15 minutes. 

Turn the dough out on a lightly floured surface. Stretch the dough by making 2-3 letter folds* turning the dough a quarter each timer, building up the surface tension on the dough. Place the dough seam side down in the sprayed bowl. Let the dough rise covered for 15-20 minutes.

Gently turn you dough out onto a lightly floured surface, seam side up. Weigh the dough, so you only shape 1 kg (a little over 2 pounds). Gently pat it to remove any large air bubbles, and form a rectangle. Make another letter fold, but only in one direction. You want to build up the surface tension, that will help you get a better ovenspring. Elongate the loaf, so it fits the length of the pan.  Make 1-3 folds, until you have a tight loaf with a good surface tension, ending up with a loaf shaped as a cylinder. Place the loaf in the pan, seam side down. Brush the top with egg wash. Slide the lid onto the pan, leaving ad slid open, so you can peek inside. Let the loaf proof for 2-2½ hours until the loaf barely reaches the top. 

Preheat the oven to 375℉ (190℃). 

Close the lid of the pan. Bake the loaf for 25 minutes. Carefully remove the lid of the pan, and bake the bread for another 10 minutes until the top is deep golden brown, and the loaf is baked through. 

Turn the bread out onto a wirerack to cool completely.

Slice the bread thinly.

Enjoy!

* Letter fold: Dough folded in thirds, like you would do a letter going into an envelope.


Focaccia - Take 2

Bread, Brunch, DinnerTove Balle-PedersenComment
Focaccia

Focaccia

It is no secret that bread is my kryptonite. Well, it's bread, cheese, coffee and red wine. But bread is a magic thing. It is magical that you can get so much flavor from a mixture of water, flour, yeast and salt. The fermentation makes all the difference. 

Last time I made a focaccia I opted for a more complex dough. It felt more greasy. This time I used the classic No-Knead Bread recipe, transforming it into a focaccia, and it turned out perfect.

Makes 1 bread.

INGREDIENTS:

  • 400 ml water finger-warm

  • 5-10 g live yeast (or little under 1 teaspoon dry yeast)

  • 500 g all-purpose flour or a high protein flour.

  • 2 teaspoons sea salt

Toppings:

  • sea salt

  • olive oil

  • rosemary like spices (or jalapeño)

  • cherry tomatoes

DIRECTIONS:

Dissolve the yeast in the water. Add a teaspoon sugar if you are using dry yeast, and wait until it starts to foam. Mix in most of the flour, befor adding the salt. Mix the rest of the flour in, mixing it until you are sure you have no lumps of dry flour. You do not have to knead this very sticky dough. 

Let the dough ferment covered on the countertop for 8-12 hours. The longer you ferment it, the more flavor you get. 

vI8aUMomQM6eDECa7KIDww.jpg

Gently scrape the dough out onto a well-floured surface. The dough will be very soft. With a spatula or bench scraper fold the 4 "sides" of the dough unto it self 3 times, to stretch the gluten and to build up the surface tension on the dough. Place the dough on a large parchment paper lined baking pan. Gently pat the top of the dough with a little olive oil, to prevent the dough from drying out. Let the bread rise for 60-90 minutes.

Preheat your oven to 425℉ (220℃). 

Pour some good olive oil on top of the dough and gently poke your fingers into the dough, making holes for the filling to rest in. This will spread the loaf out making it more flat and ready to receive the filling. Sprinkle rosemary and more oil over the loaf and press it into the holes. Gently press the tomatoes into the dough.  Sprinkle with a little more oil and a good amount of salt.

 Let the focaccia rise for another 30 minutes before baking it for 20-25 minutes at 440℉ (220℃). I baked mine on a baking stone, but still on the parchment paper for easier handling.

Let the bread cool in the pan before serving. 

Enjoy!

Croissants

Bread, Breakfast, Brunch, Desserts, techniqueTove Balle-Pedersen1 Comment
Croissant.JPG

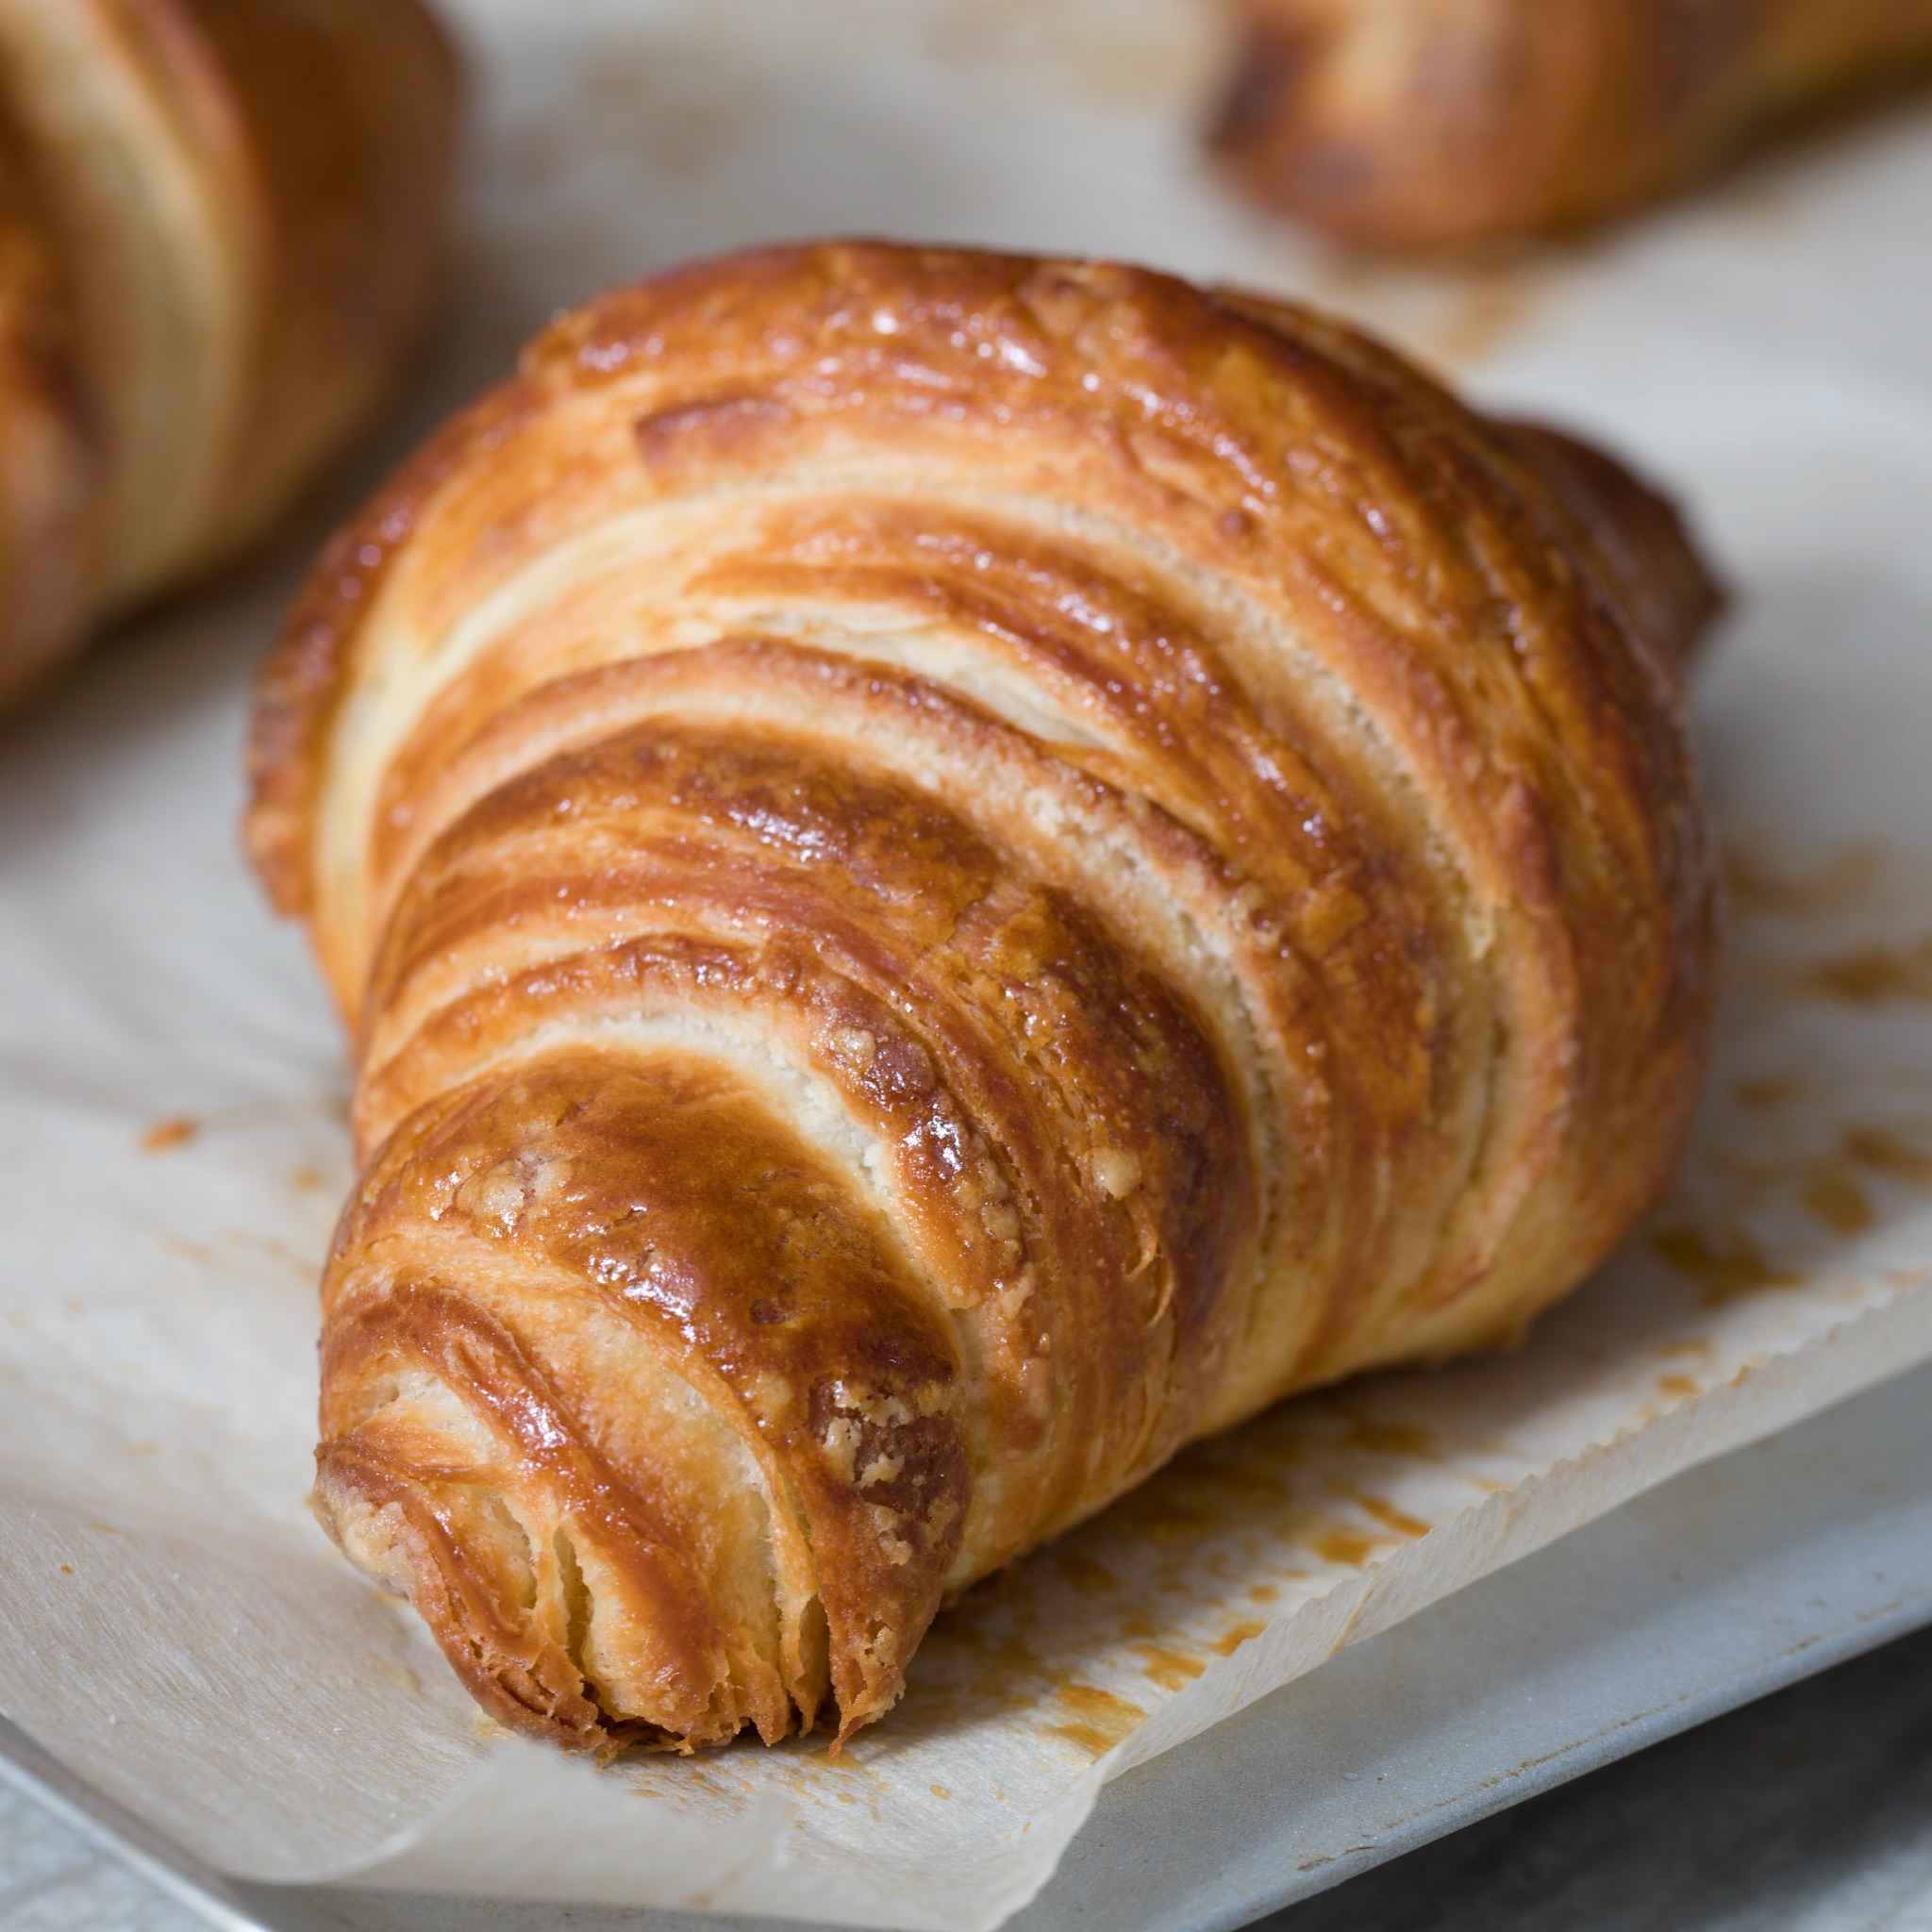
Croissants are made from a yeasted dough laminated with butter. It is so so good.

The trick is to keep the dough and the butter at the same temperature and texture, to prevent soft butter bleeding out of the dough. A too cold dough will crack a bit, so you are looking for a firm but yet soft dough.

There are different kinds of folding/turning when it comes to pastry and croissant dough. 

Letter fold or Single turn: Dough folded in thirds, like you would do a letter going into an envelope. (I did that for this recipe.)

1. Turn: makes 3 layers of butter

2. Turn: makes 9 layers of butter

3. Turn: makes 27 layers of butter.

Book fold or double turn: Dough folded to the middle and folded again on the middle like a book. This makes 4 layers per fold or turn as they are called.

1. Turn: makes 4 layers of butter

2. Turn: makes 16 layers of butter

3. Turn: makes 64 layers of butter

You can mix the folding methods to get the amount of layer you want. Theoretically you can make how many layers you want, but making too many layers makes you end up with a brioche dough, made the hardest way possible 😉.   

At the croissant class I attended I learned that Manresa Bread use 2 double turns (16 layers) for regular croissants, and 3 single turns (27 layers) for chocolate croissants. For traditional Danish pastry you normally use 3 single turns, giving the desired 27 layers of butter. If you are looking for a traditional puff pastry, you need 144 layers


Makes this 20-24 croissants. 

Ingredients:

Dough/Détrempe:

  • 750 g bread flour

  • 200 g water, lukewarm

  • 187.5 g milk

  • 90 g sugar

  • 22.5 g salt

  • 65 g live yeast (15 g dry yeast)

  • 7.5 g malt powder

  • 37.5 g butter, room temperature

Beurrage (butter):

  • 450 g cold butter

  • all-purpose flour for dusting

Directions:

Dough/Détrempe:

Mix the milk with the water, dissolve the yeast in this mixture. Add the sugar. If using dry yeast, let the yeast wake up for about 5-10 minutes, until creating a foam on top. 

Mix in half of the flour and malt powder, forming a sticky dough. Mix in the softened butter. Finally mix in the rest of the flour and knead the dough until you have a shiny, slightly sticky and elastic dough, for about 3-5 minutes. The dough will be a bit on the dry/tough side.
Shape dough into a ball and place it in a dough rising bucket, or another large covered container. Let the dough fermented overnight, this will give you a good flavor.

Beurrage (butter):

Place the cold butter on a well floured surface. With your palms press the butter a little flat. Using a rolling pin pound on the butter to flatten it. Fold the butter into it self, and keep pounding and folding until the butter has the same consistency as the dough. You want to end up with a 30x32 cm (11x12.5 inch) sheet of soft but still cold butter. If the butter is too warm or too hard, it will be hard to roll it out in the dough, and it might make holes in the dough, instead of the lamination.
If you don't want to add any flour to your butter, you can pound and roll out the butter between sheets of parchment paper. Chill the butter while you roll out the dough. 

Laminating:

Place dough on a lightly floured surface, roll it out to 62x32 cm (24.5x12.5 inch), so the dough is the width of the butter, but a little over double in length. Clearly I rolled my dough longer than necessary, but it worked fine anyway. Place the butter on the dough, and wrap it with the dough, pinching the edges, meeting in the middle of the dough, together. Chill the dough package covered in the refrigerator for about 15-20 minutes, before starting the folding/turning.

croissant.jpg

Roll the dough to a rectangle, 3-4 times as long as the height. Keep it lightly floured so the dough do not stick to the surface. Make sure to roll the dough with straightedges. This will ease the folding.

Fold the far edges into the middle and fold again on the middle like a book. Now you have 4 layers of butter. Place the covered dough in the freezer for about 20 minutes to cool the butter again, and to relax the gluten.

Repeat this one more time, making 2 double (book) turns and ending up with 16 layers of butter. If you want to use this dough for Danish pastry or chocolate croissants, I would make 3 single turns, so you end up with 27 layers.

Before shaping the croissants you want the dough to rest covered in the refrigerator for at least 45-60 minutes. And letting it sit covered for 5 minutes on the kitchen counter, letting the butter to soften up a bit.

Shaping the croissants:

fullsizeoutput_1eef.jpeg

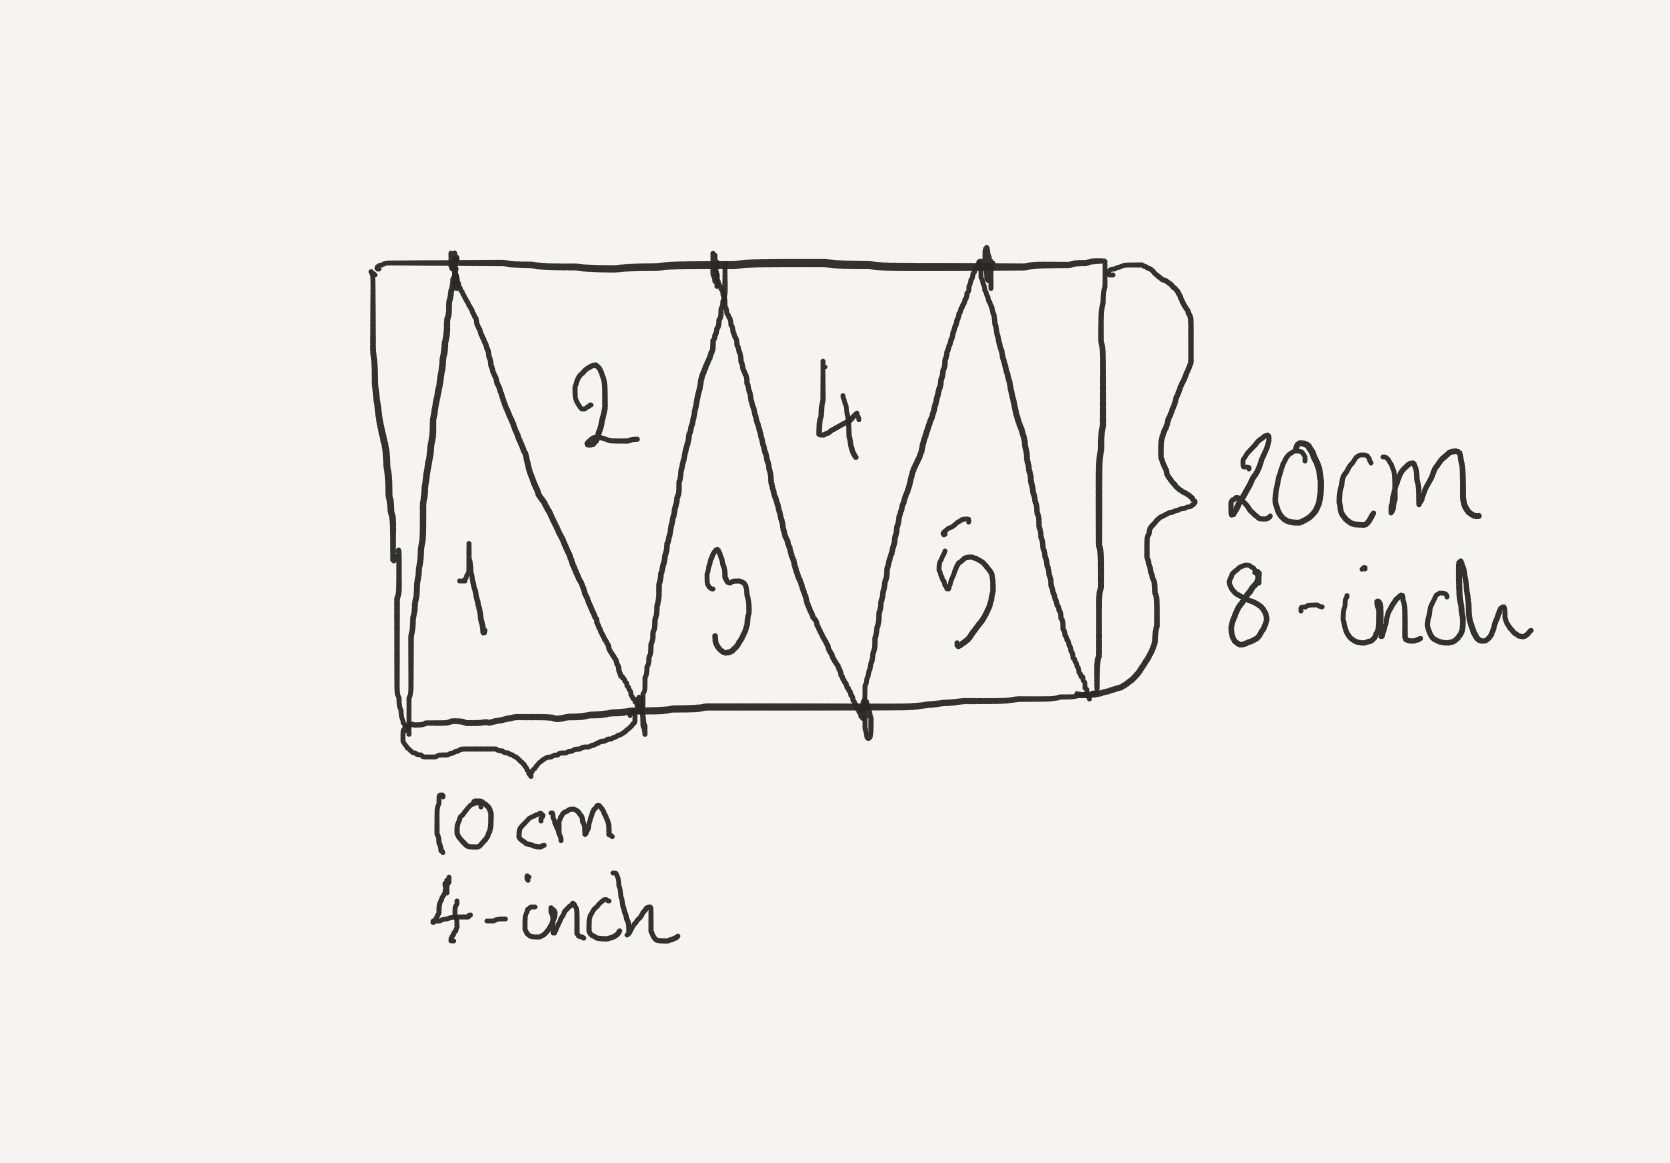
Roll half the dough out to a 20x40 cm (8x16 inch) rectangle. Using a knife or pizza slicer to cut the dough. Cut the croissant triangles as shown in the picture. (you get 7, not 5 croissants from the dough, I missed the last 2 in the picture, sorry). Let the dough rest covered 5 minutes to relax the gluten a bit. 
Stretch the triangle, so you elongate it, be careful not to rip the dough. Roll the dough towards the tip of the triangle, making sure that the tip is on the underside of the croissant.Place the croissant on a parchment paper lined baking sheet, spaced at least 5 cm (2 inch) apart.

Proof the croissant covered at maximum 85℉ (29.5℃) for 45-60 minutes until doubled in size. I have a proof setting on my oven, so I can use that, with a cup of boiling water sitting next to the baking sheet. But you can also proof the croissant on the kitchen counter, in a large air filled plastic bag.

Presheat oven to 350℉  (177℃) convection or 375℉ (190℃) foer non-convection.

Gently brush the croissants with egg wash, covering the exposed surfaces not allowing the egg wash to drip or pool.

Bake the croissants for 15-20 minutes, until golden brown. Let the croissants on the baking sheet on the kitchen counter. 

Serve the croissants within a day. 

Enjoy!

y7P8gX3USIuet5IT8olPPg.jpg


Tip:

The unbaked pastry can be frozen just, after shaping, individually, and can be baked straight out of the freezer, just add about 5 more minutes to the baking time.


Tip:

Leftover croissants can be used for almond croissants. Make some frangipan (125 g almond flour, 125 g butter, 125 g powdered sugar, 12 g all-purpose flour and 1 large egg, all mixed together) and smear it inside the croissant, and on top, before baking it for xx minutes.


Chocolate & Walnut Babka

Bread, Brunch, CakeTove Balle-Pedersen4 Comments
Chocolate & Walnut Babka

Chocolate & Walnut Babka

Babka is an Eastern European brioche sweet yeast bread. Kinda similar to the Cinnamon Bread I knew from growing up in Denmark. Same but different.
Every slice reveals pockets of molten chocolate with crunchy walnut bites in the soft and sweet brioche bread. The intense chocolate filling makes this loaf a really great cake. As a not that chocolaty girl, all I can say is YUM, YUM, YUM.
 

Makes 2 loafs

Ingredients:

Dough:

  • 1½ cup (3 dl) whole milk

  • 113 g butter, salted

  • 100 g live yeast, or 8 teaspoons dry yeast

  • ¼ teaspoon vanilla paste

  • ¼ teaspoon cardamom

  • 100 g sugar

  • 1 large pinch salt

  • 750 g all-purpose flour

Filling:

  • 185 g dark chocolate

  • 125 g butter, salted

  • 100 g confectionary sugar (powder sugar)

  • 4 tablespoons unsweetened cocoa powder

  • ¼ teaspoon vanilla bean paste

  • ½ teaspoon strong coffee

  • 125-150 g walnuts

    Glaze:

  • Honey

  • lemon juice

  • hot water

Directions:

Dough:

Heat the milk until warm and melt the butter in it. Pour the mixture into a bowl. Make sure the milk is only finger warm before adding the yeast.

Add yeast, sugar, salt and vanilla paste and stir until the yeast is dissolved. Add all the flour, and finally the eggs. The dough is very wet, but keep stirring, it will form a dough.

 Let the dough rise until it's doubled in size, for about 1 hour. 

Melt butter and chocolate, and mix in sugar, cocoa, coffee and vanilla. Let the mixture cool down, set aside.

Pour the dough out onto a flour dusted workspace, and fold the dough 4 times, to deflate it. Divide the dough in 3. Roll out each part so they are twice as long as your loaf pans and about four times as wide.

Spread the filling evenly on the dough, leaving a strip along the short side free of filling. Sprinkle with the chopped walnuts. Roll up the dough, like you would cinnamon rolls, ending with the part that is free of filling.

My rolls were a bit soft, so I chilled them in the freezer for no longer than 20 minutes, just to firm them up.

Cut all 3 the rolls in half lengthwise, so you end up with 6 half circles, and braid 3 of the halves, with the filling "lines" facing upwards. Fold the end in under the braid, and place it in a parchment paper lined loaf pan. Repeat with the other 3 of the halves for the second loaf. 

Let the loafs rise for about 30-45 minutes.

Preheat the oven for 375℉ (190℃).

Bake the loafs for 45-60 minutes, covering the loafs with aluminum foil the second half of the bake time, to prevent burning the crust.

Brush a little glaze on the loafs after letting them cool for a while.

Enjoy!

Sifted Rye Bread - Sigtebrød

Bread, Breakfast, BrunchTove Balle-PedersenComment
Sifted Rye Bread - Sigtebrød.

Sifted Rye Bread - Sigtebrød.

This is a very old type of Danish bread. When I worked at a Bakery in Denmark, we only sold a few, if non, sifted rye breads a day. And the customer would most likely be an old person. I think younger people wanted the fancy seeded breads. But quite frankly the sifted rye bread is very tasty. The crumb is a little more compact, without being dense. The recipe calls for "sigtemel" which is a sifted flour made from 30% rye and 70% wheat.

Makes 2 breads.

Ingredients:

  • 50 g live yeast (4 teaspoons dry yeast)
  • 400 ml tempered water
  • 3 tablespoons honey
  • 300 ml (1¼ cup) buttermilk
  • 300 g all-purpose flour
  • 700 g sigtemel (210 g dark rye flour + 490 g all-purpose flour)
  • ½ teaspoon ground caraway seeds
  • 5 teaspoons salt

Directions:

Dissolve the yeast in the water. If you use dry yeast add a few pinches of sugar. 

Add buttermilk, flours, ground caraway seeds, salt and honey, and knead the dough for 5-8 minutes to build up the gluten. Let the dough rise for about 60 minutes in a warm spot.

Knead the dough for a few minutes, and divide the dough in two.

Use the heels of your hands to gently flatten the dough into a rough rectangle. Fold the bottom third up, like a letter fold. Fold the bottom third of the dough over on itself. Press the folds with the heels of your hands, to seal. Fold the dough once more, building up the surface tension. This will help the loaf rise evenly and keep its shape. 

Place the loaf in a greased pan with the seam facing down. Repeat with the second loaf. I have a large pan that will hold both loafs, letting them “grow” together.

Preheat oven to 400℉ (200℃).

Let the loaf rise for another 40 minutes. Poke the top with a fork, and brush it with some milk. Bake loaf for 30-40 minutes. Let cool on a wire rack.

Enjoy!